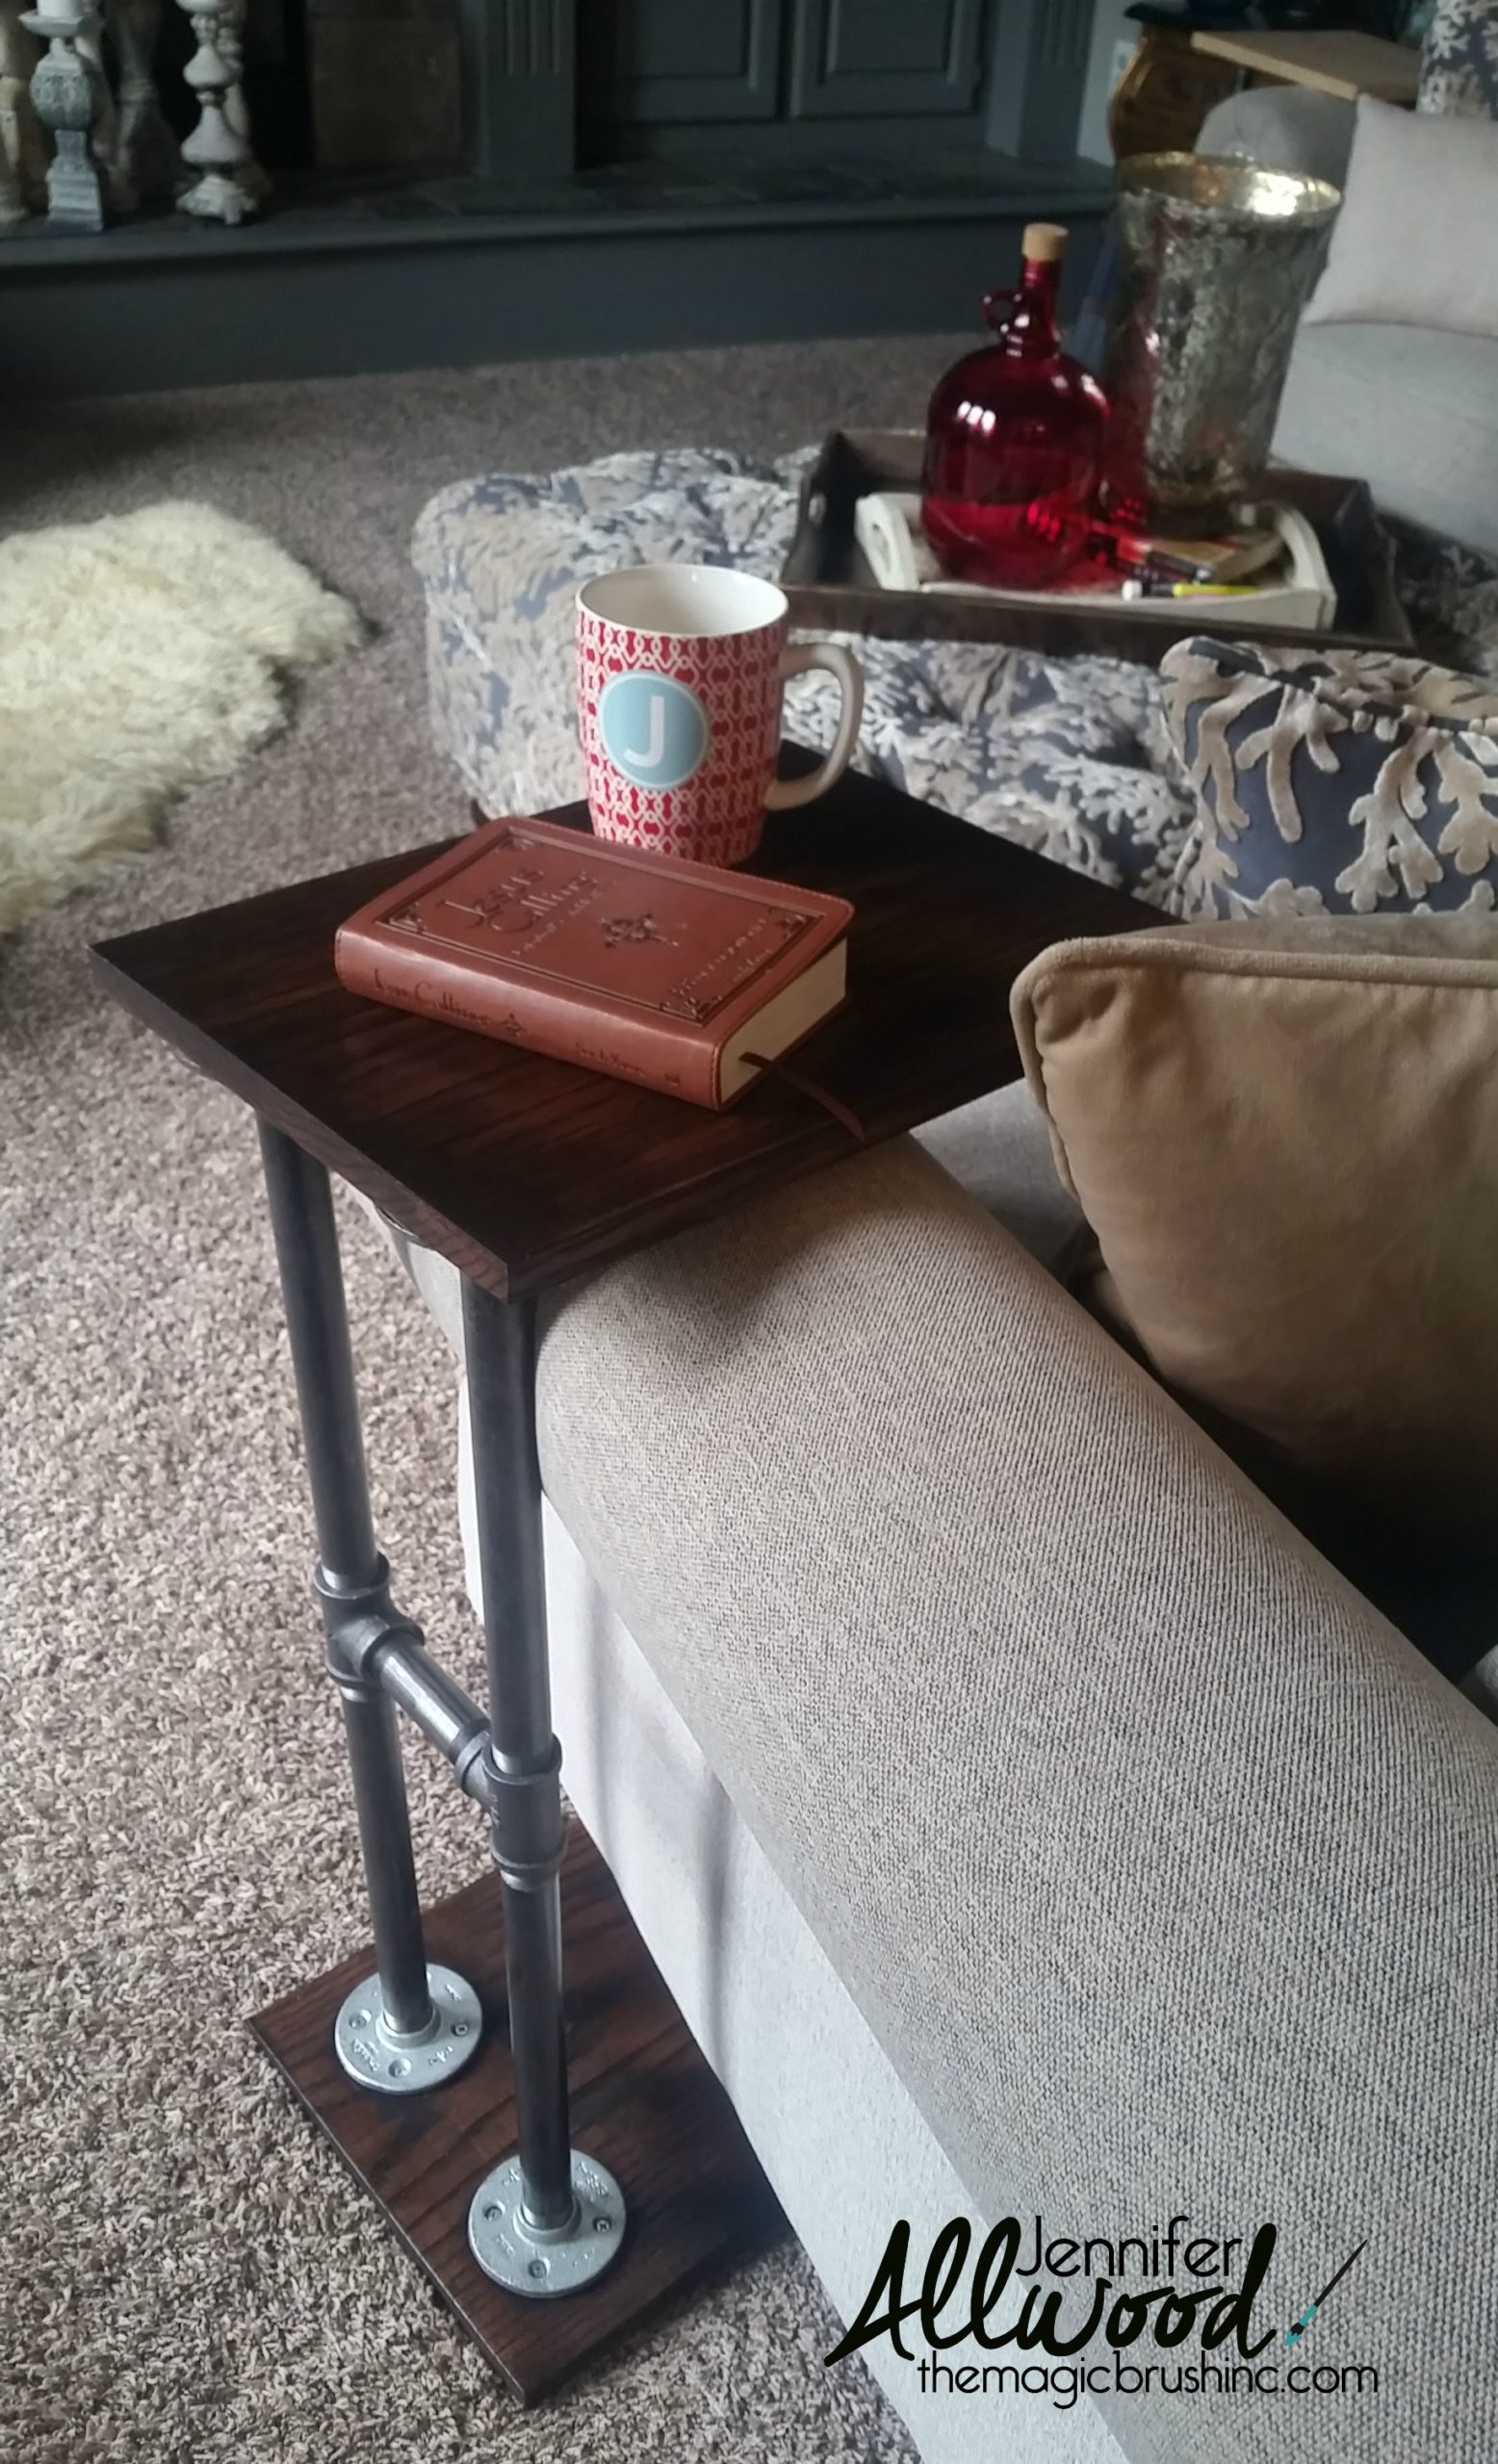
Did you know they were even called that? I didn’t! I called them “the little tables that scooched under the bottom of the sofa”. One of my amazing Facebook followers clued me in ….. they are “C” tables cuz’ they are shaped like the letter “c”. #MindBlown. You guys are so smart!
So anyhoo, Mr Magic made me two of these nifty little tables because when we are sitting in our new sectional, I have nowhere to put my coffee unless I lean wayyyyyyyyyy forward and set it on the ottoman. I know, first world problems, right?
So without any plans, without looking at any Pinterest ideas (he is not on social media), without googling of any kind….. Mr Magic made me this table. And I’m slightly shocked by good it looks.
It looked soooooooo good that we’ve had 2 friends place “orders” for one of their own tables. Ha! This one we made for our friend Samantha.
So I did a pretty poor job of getting pics of this project because Mr Magic does not realize that when you blog…….. every step is a photo opp, right my friends??? He just barreled through the project fast and furious and I was negligent in my picture taking. So, I’ll give you what I have plus a video at the end which should help with the specifics!

First, Mr Magic attached metal flanges to a piece of oak wood that we had cut at Home Depot for us. If you watch the video at the end, you’ll hear that he is clearly the winner in our “flange or phalange” spelling debate. We were smart enough on the 2nd table to STAIN and TOPCOAT the wood BEFORE putting it all together. Progress, not perfection…..
At first we bought these industrial pipes that just screw into the flanges, but Mr Magic didn’t like how it looked and he wanted support in between them.

I thought the armchair table was fine as pictured above, but he insisted.

So we got new pipes that were shorter and some “tee bracket” he called them and again…. MR MAGIC WAS RIGHT. That just changed the look of the whole armchair table!
I literally took no pictures of us staining and topcoating these tables. But I can tell you we use Java Gel on one table and Old Masters Gel Stain in Dark Walnut on the other. We really could not tell the difference in the 2 other than the Java dried quicker. Both were topcoated with Modern Masters Masterclear.
And this is the end result. So easy and fits PERFECT on top of the arm of my sectional. And look, my coffee IS RIGHT THERE FOR ME so my precious self doesn’t have to lean forward! Ha!
I knew you would have questions about the kind of wood we used and the type of metal pieces and all of those details that MAKE MY EYES GLOSS OVER….. so I put Mr Magic on the spot and asked him to give you the details in a video. You can watch it HERE or click on the arrow below.
I adore that guy. He is adorable + handy.
As always, feel free to PIN the individual pictures of this armchair table in this post and I’ll have this project up on my Pinterest page soon!
Blessings,
Jennifer
If you loved this simple DIY home project, I have more project ideas in my FREE video: 10 Things You Can Do to Update Your Home Before Dinner. These easy updates don’t involve building furniture but will help you tackle some much-needed upgrades to your home!



5 comments