If you follow my Magic Brush Facebook page, you’ll know that I recently repainted my entryway table to look like the picture above. I know, I know. It’s almost white. And I thought I was allergic to white. Who knew??
(This post contains affiliate link for those products that I love & recommend.)
I have loved this piece for many, many years but I am just soooooooooo over the dark, heavy colors in my home. So it was time to go and I was MORE THAN ready.
 My hubby took our kids out of the house for the afternoon so that I could paint in peace and quiet (God bless them and their noise), I was sligggggghtly excited. Lol.
This post does contain affiliate links. I only recommend products that I know and love and think you will love too!
I also shared on Facebook some of my very technical, highly secret faux finishing tips. Like using cans of chicken breast under the bottoms of my furniture pieces to elevate them off the ground while I paint them (so you can paint all the way to the very bottom of the piece).
Like this. Isn’t that genius? I know, I could use 2 x 4s. But it’s so much more fun to show you something out of my pantry. And the kitchen is closer than the garage. And I like chicken better than 2 x 4s. Done.
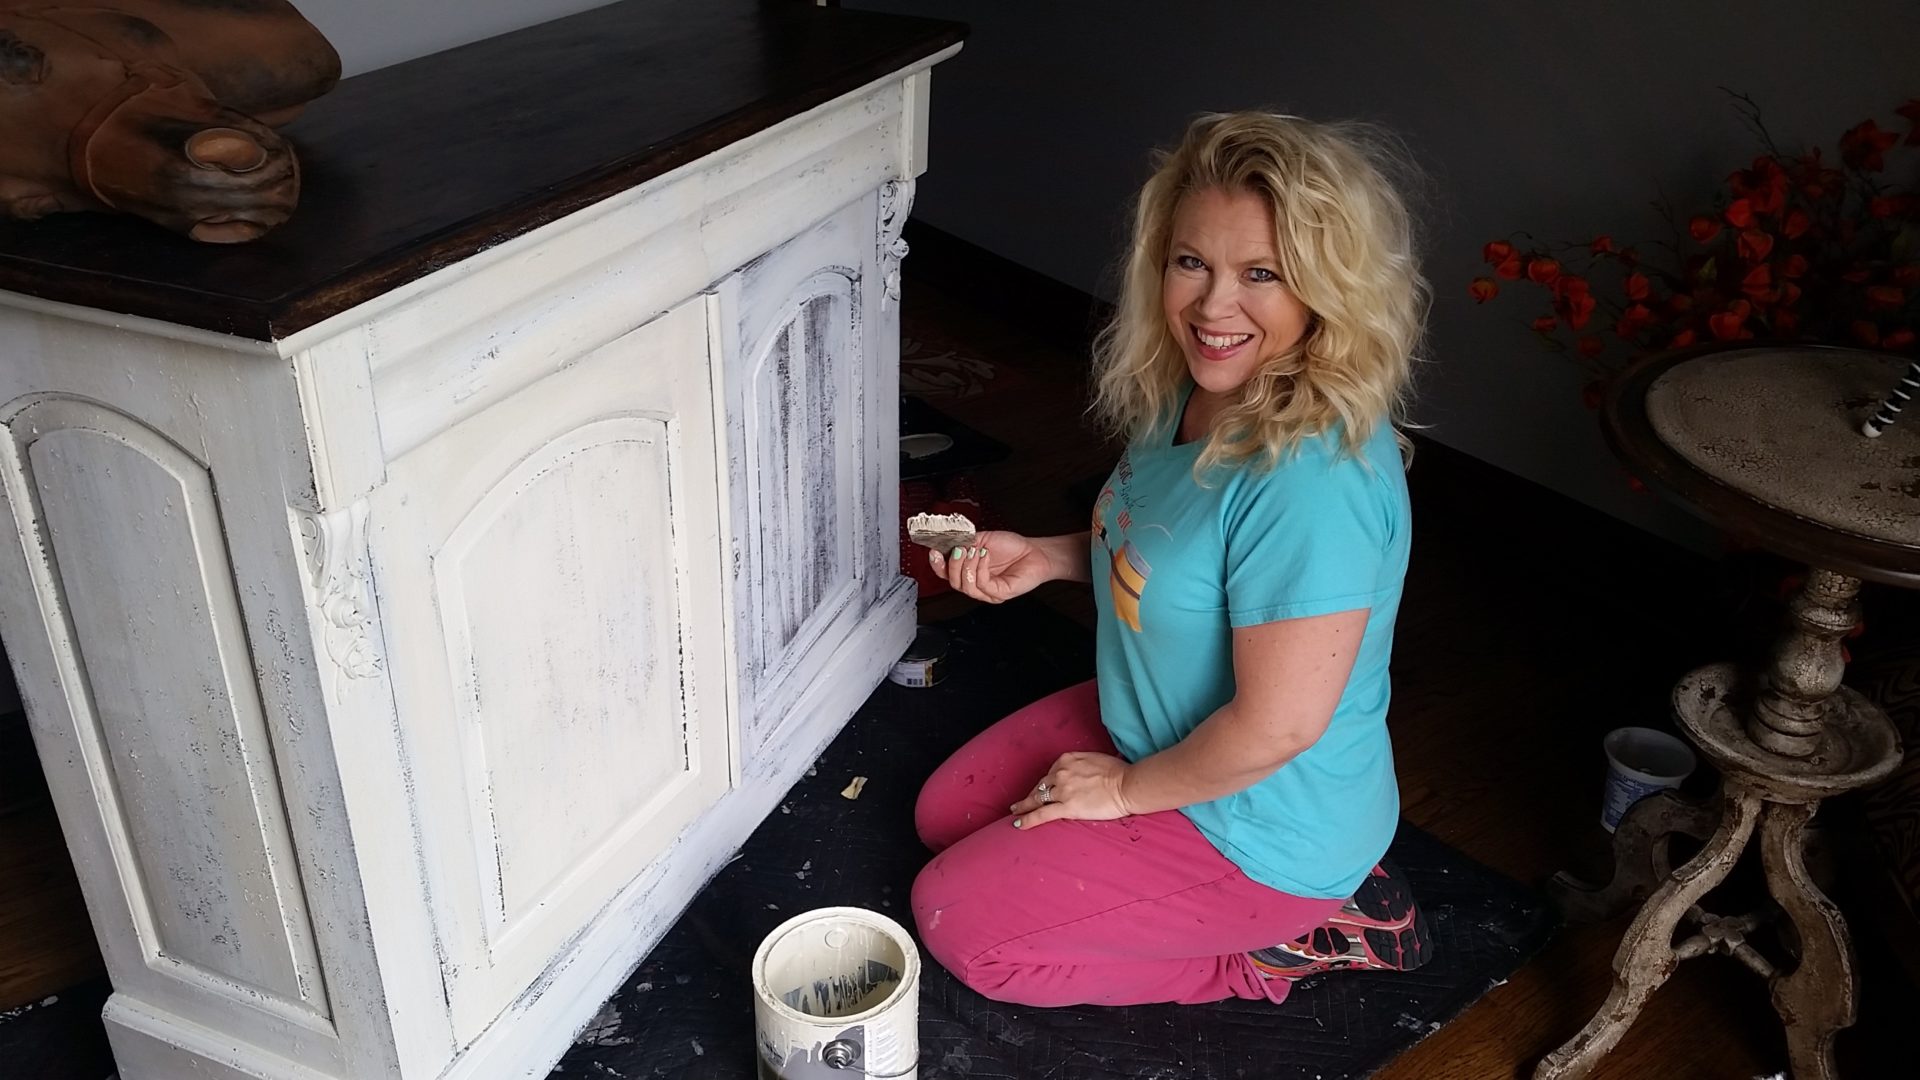
So I started by using a white colored primer and I dry brushed that over 85% of the piece. I wanted primer because it looks dry.
Since this project I have gotten hooked on Heirloom Traditions chalk-type paint and instead of primer and paint, if I were to do it again, I would just use this chalk-type paint color – French Vanilla – in one coat and be done with it.
Then to give it some depth, I immediately went back over 85% of it with a cream SW 6126 paint in a gloss finish. That way, you could see some of the original caramel/brown and the matted white color below but yet, it was mostly an off white gloss when finished. ***love***
See above. None of that is needed with the chalk-type paint!
I got half thru the project and got hungry. Again, the kids were gone and I was painting in peace, hence the euphoric look on my face. Moments like these are rare.
This is a close up of the painted finish. The cabinet had a great texture on it from the last time I painted it. I’m pretty sure I had rolled it with Faux Effect’s Plastertex years ago.
You can watch a video of me painting this piece here:
Or, if you go here on YouTube. Sometimes videos are more helpful to explain.
After I was all finished putting the paint on, I sanded the edges of the piece while it was still a little wet. This is so much easier than letting it dry totally.
Of course, I did another short video of that which you can watch below or click here.
And yes, my precious kiddos were back in the house at this point. You can hear their sweet little voices on the video! Bless their hearts.
When I got it done with the sanding, I was loving it, but I thought that it needed knobs (the original piece had no handles), so I put on my big girl pants and drilled the holes in myself.
And now I love it even more because of the shiny bling on the knobs combined with the old, chippy look of the piece. **bliss**
And here is the finished cabinet once again. I feel like my entryway lost 20 pounds. Seriously, for a girl who hates white…. I am in love!
If you love this piece, and want to learn how to paint furniture or challenge yourself with learning NEW finishes and techniques, join my Paint Finish of the Month Club. You’ll get access to my 20 DIY video plus two fabulous guest instructors each month will teach you a gorgeous new finish which they have created/perfected.
I’d love to hear if you are working to lighten up your interior also? Or at least tell me if you elevate your furniture pieces with chicken breast cans. lol. Comment below!
Much love,
Jen
More painted furniture ideas on my Painted Furniture Pinterest board . Please share my white entryway table makeover and follow me on Pinterest!




3 comments
The piece is so lovely. White really is great to freshen everything up.