
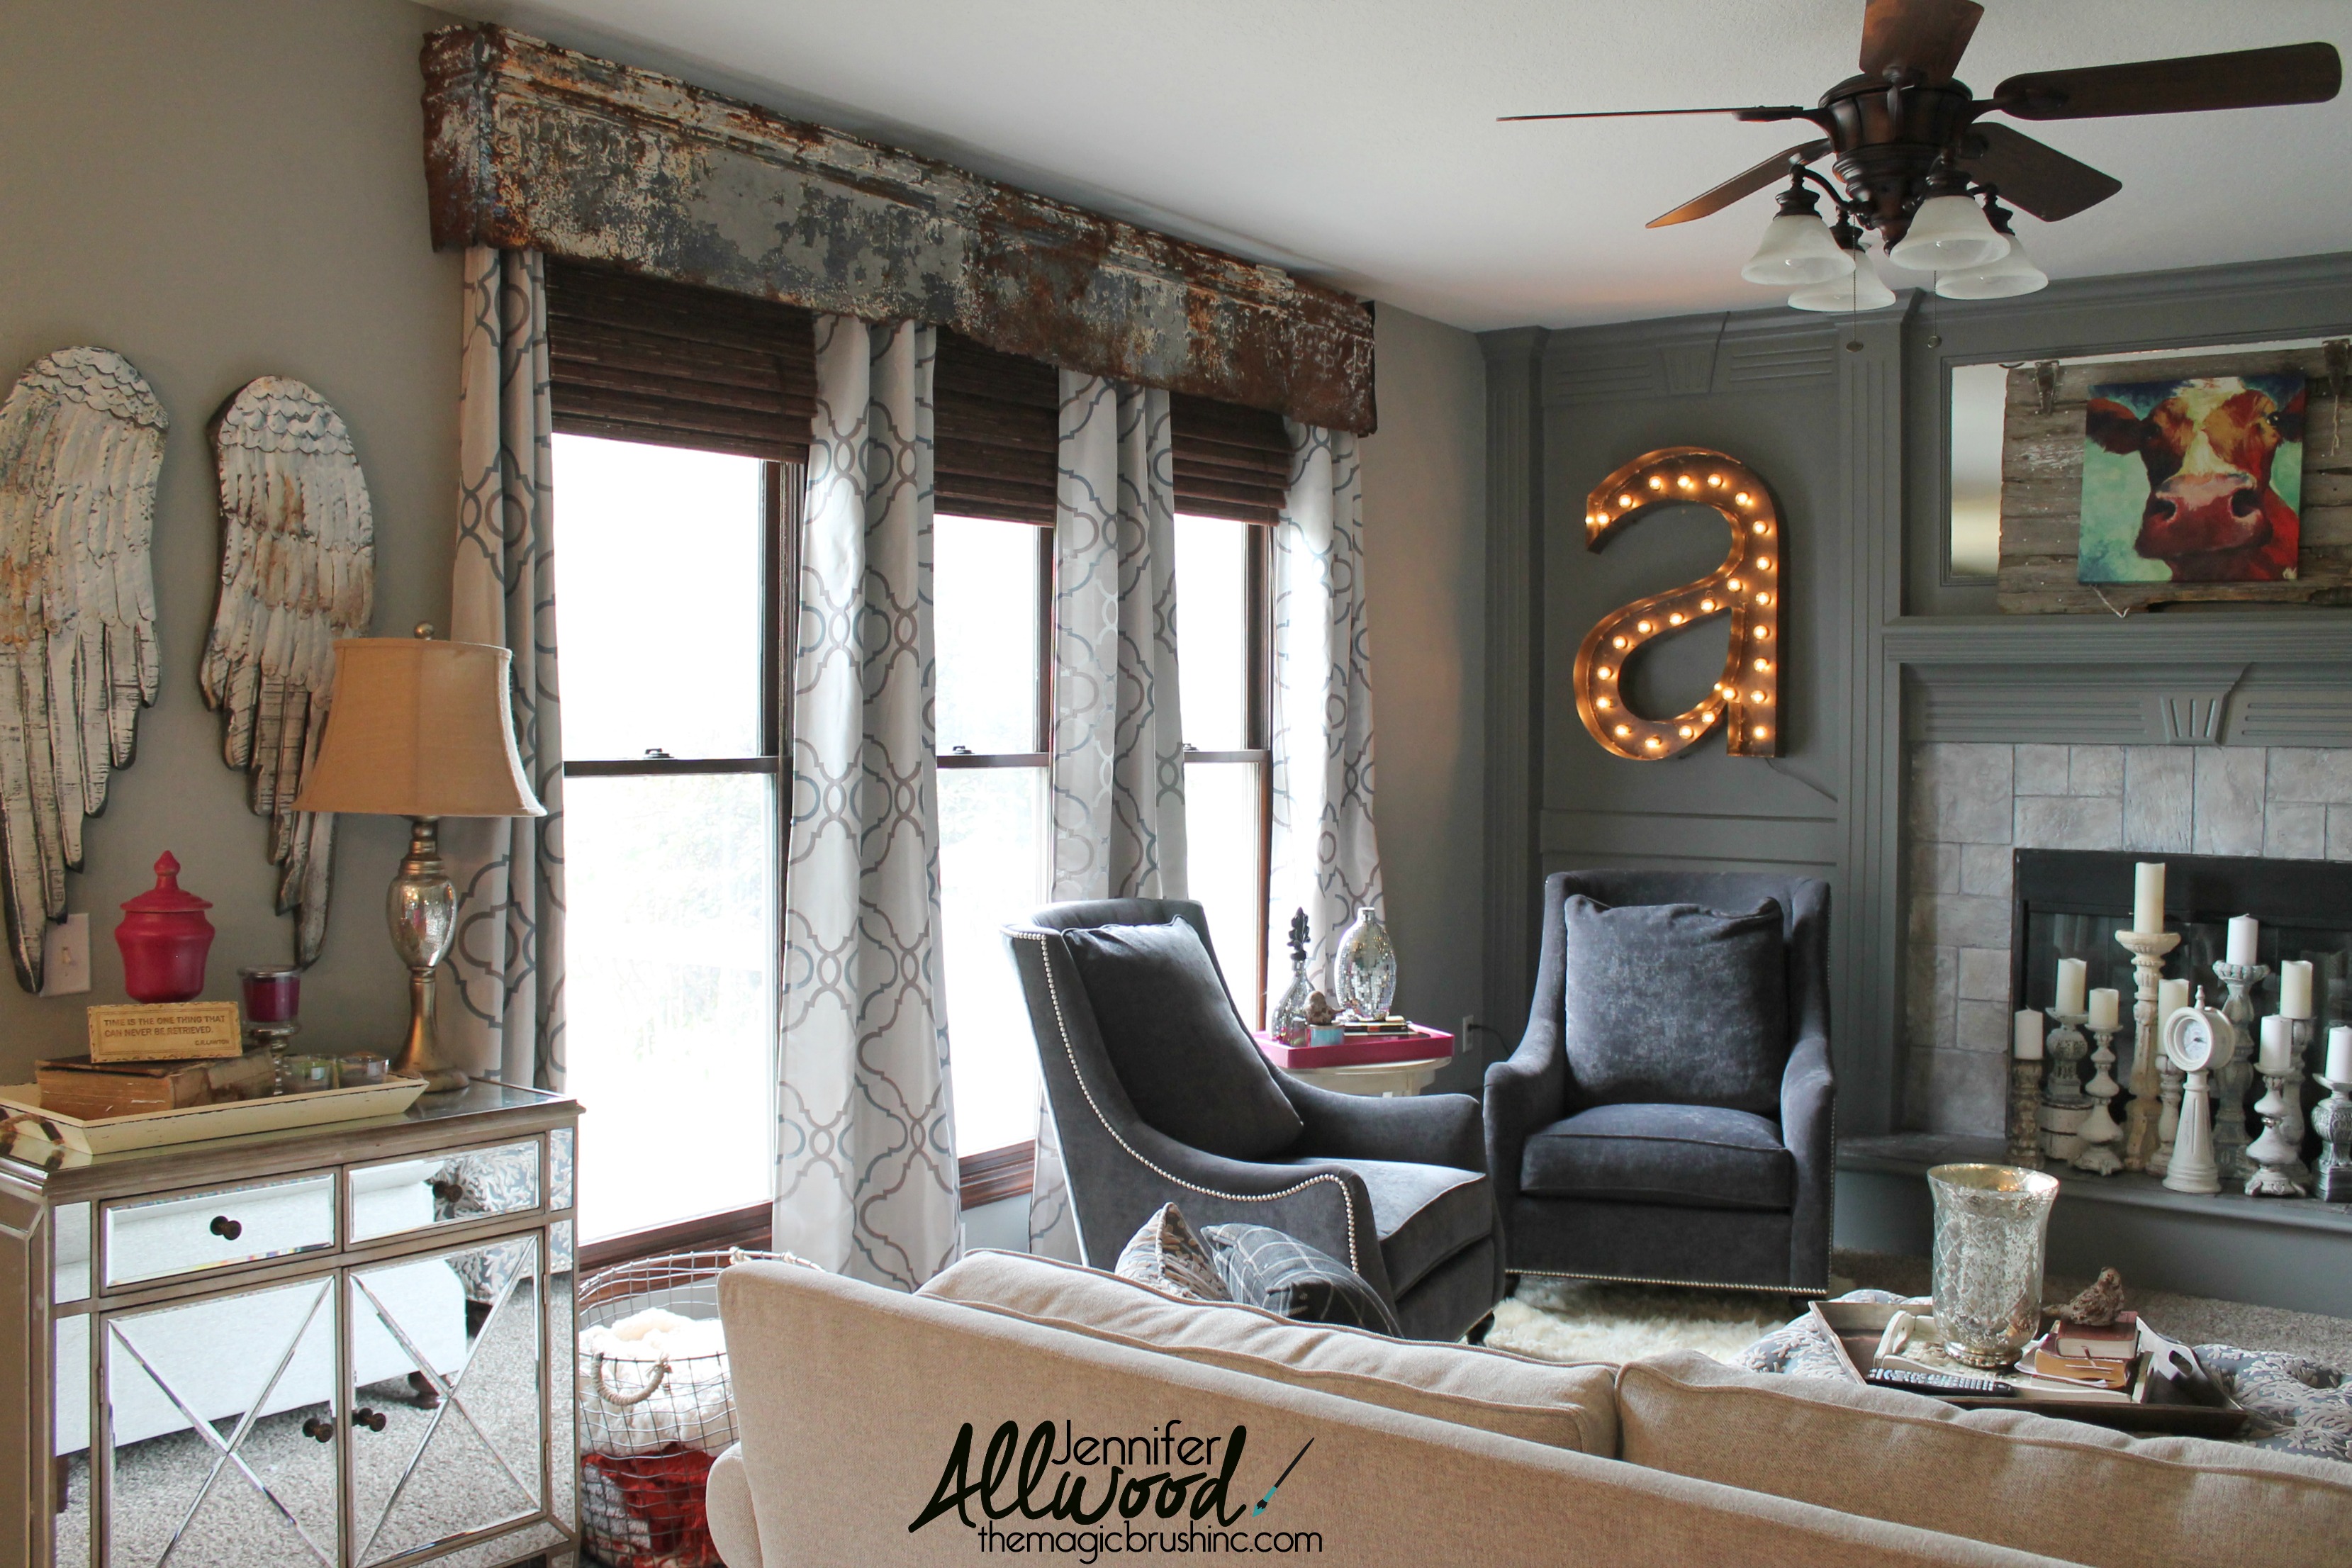
I am over here doing a happy dance at how my rusted tin repurposed cornice board just turned out!!!!! Rusted tin is my 2nd love language (right behind glitter). It makes my heart beat fast. And I know what you’re thinking…. how can I love glitter AND rust at the same time???? IDK, I just do.
This is my favorite room in our house right now because of all the differences in it. I love the rust on the tin just as much as I love the more glamorous mirrored chest. And I love the rustic angel wings right along with the fur rug in the room. I like the playful cow print, but I also love the fancy nail heads on my furniture. I have an old garden gate on the fireplace right next to my marquee light, which is such a fun twist. I love putting old thing with new! It feeds ALL of my senses!!!!
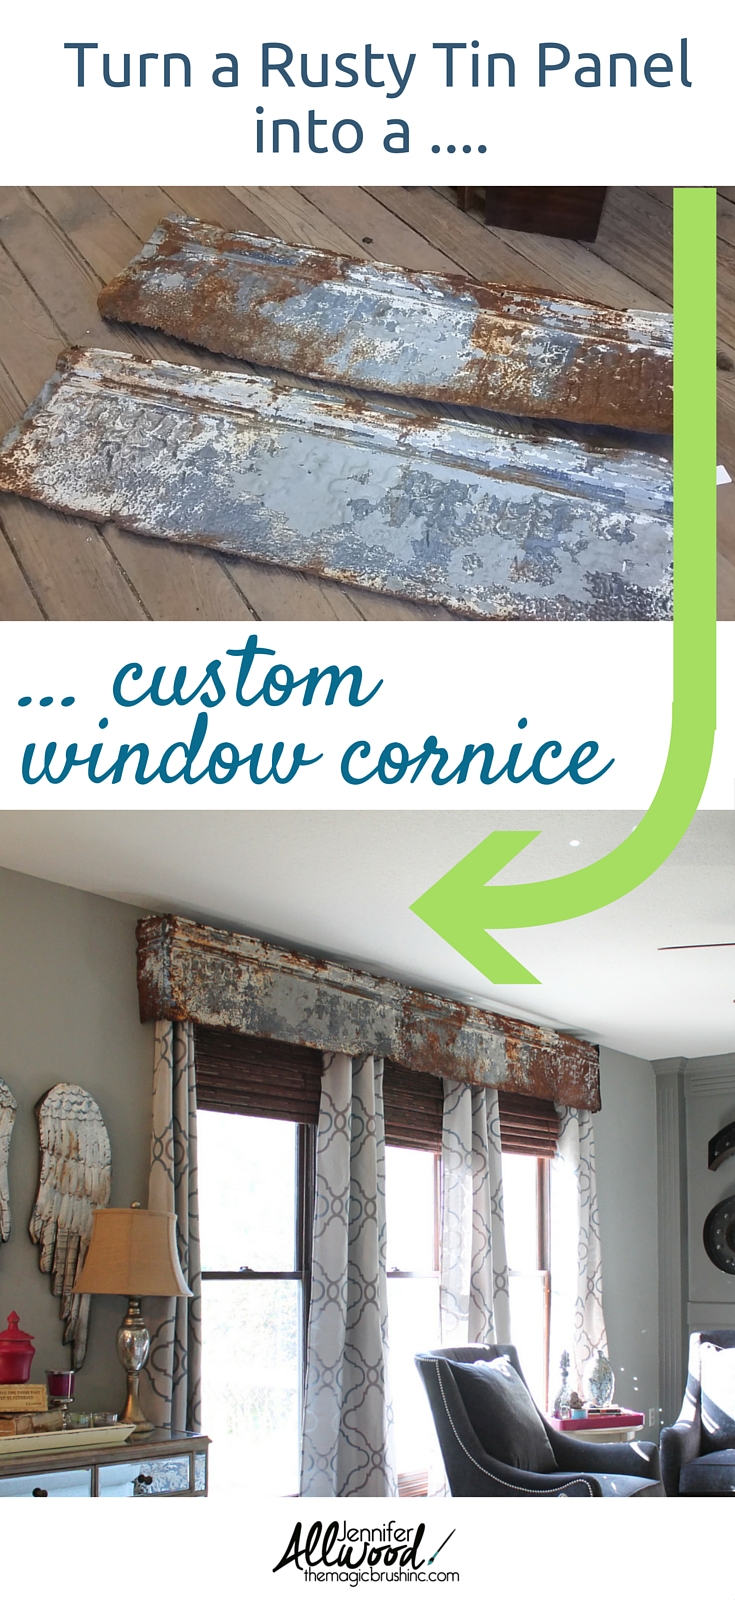
So here is what we started with:
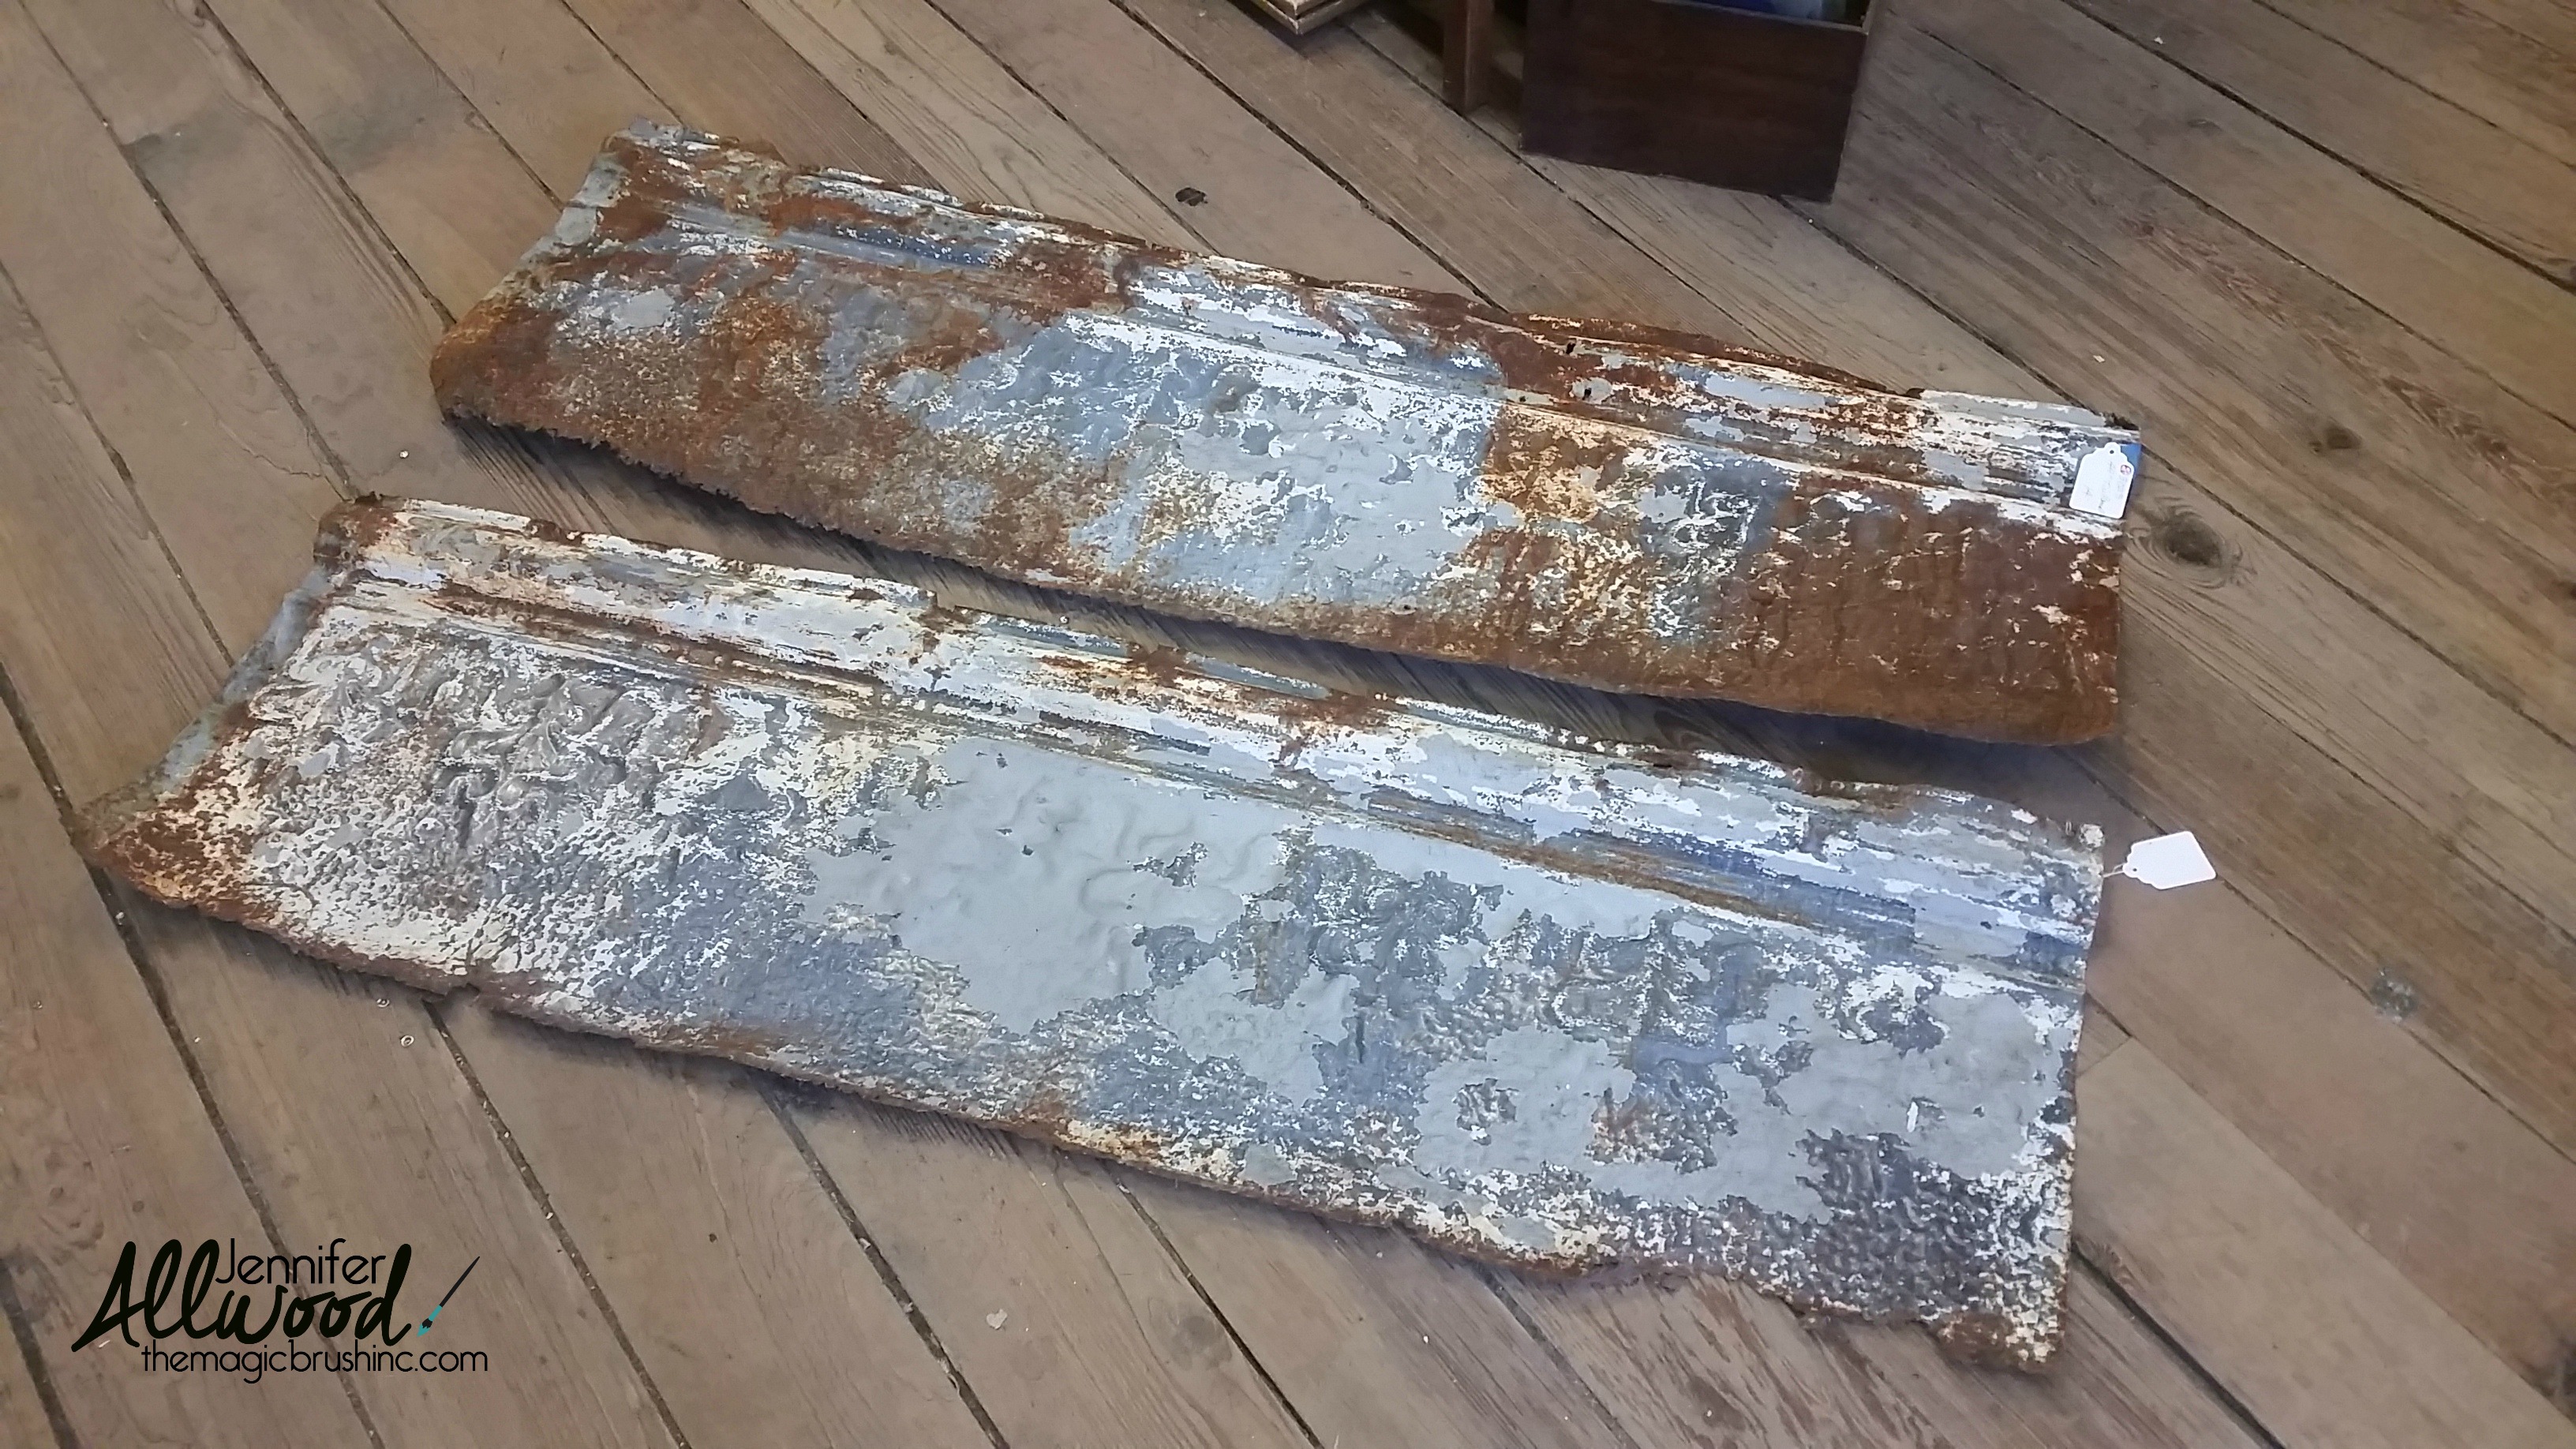
I found these 2 rusty tin panels in an antique store in Kansas City. I originally thought I would just prop them on top of my kitchen cabinets. And I DID love them there, but then I decided to use them as a cornice board. So, I went back to the store and bought a 3rd smaller and very rusty panel too!
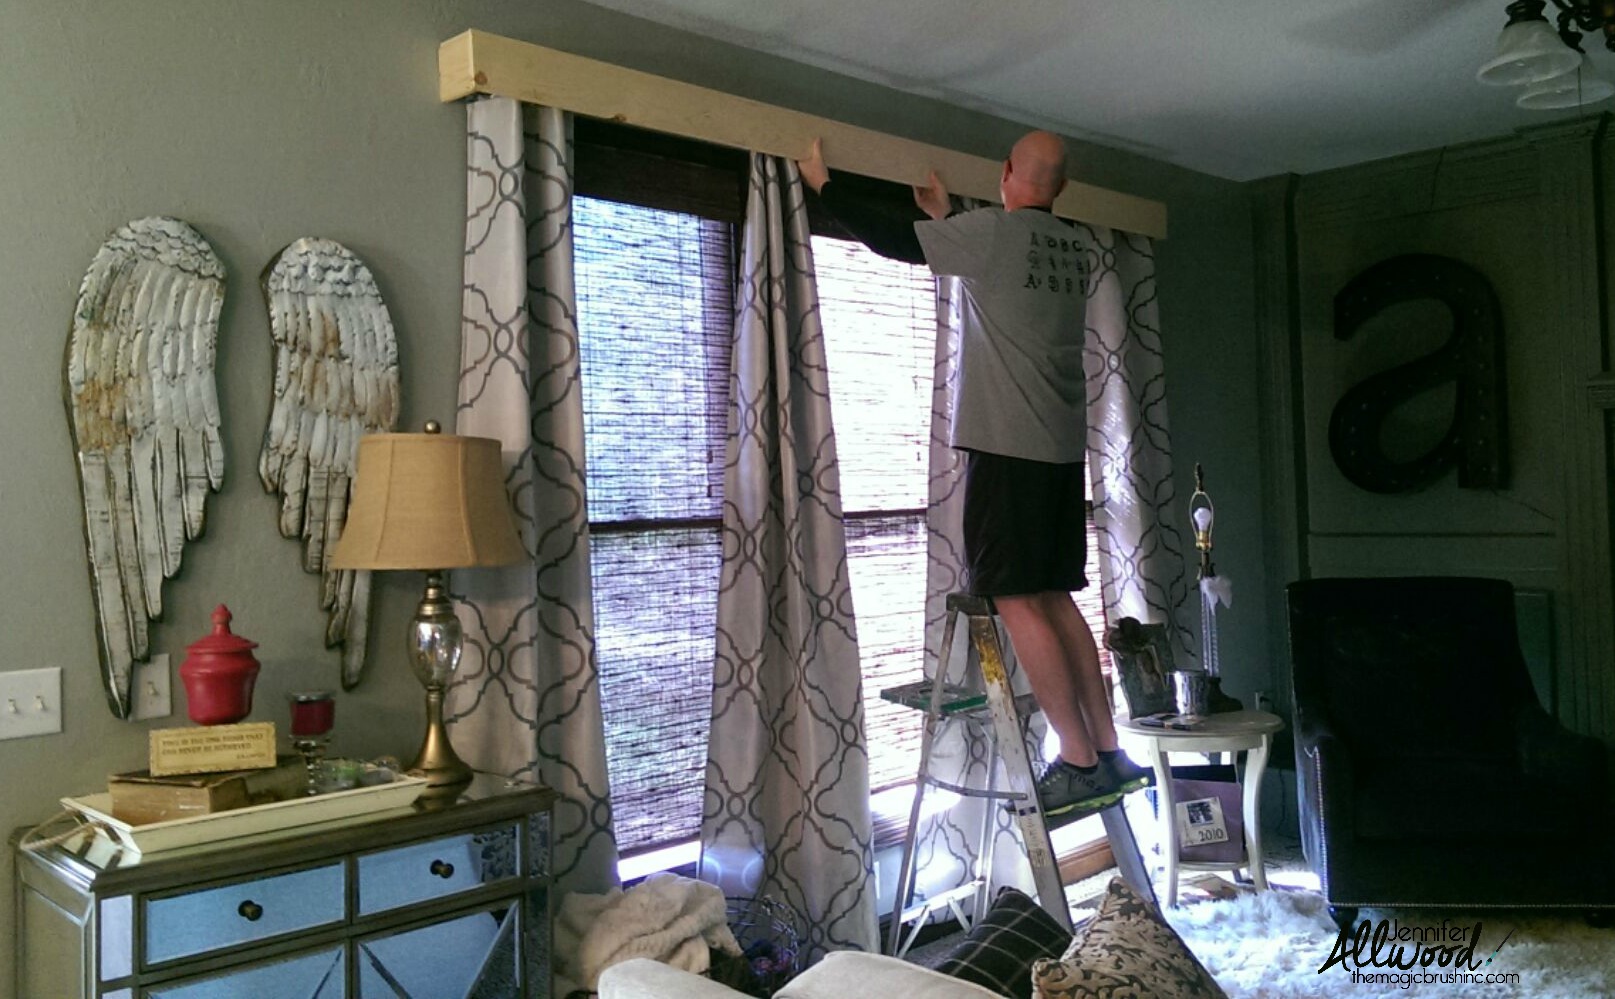
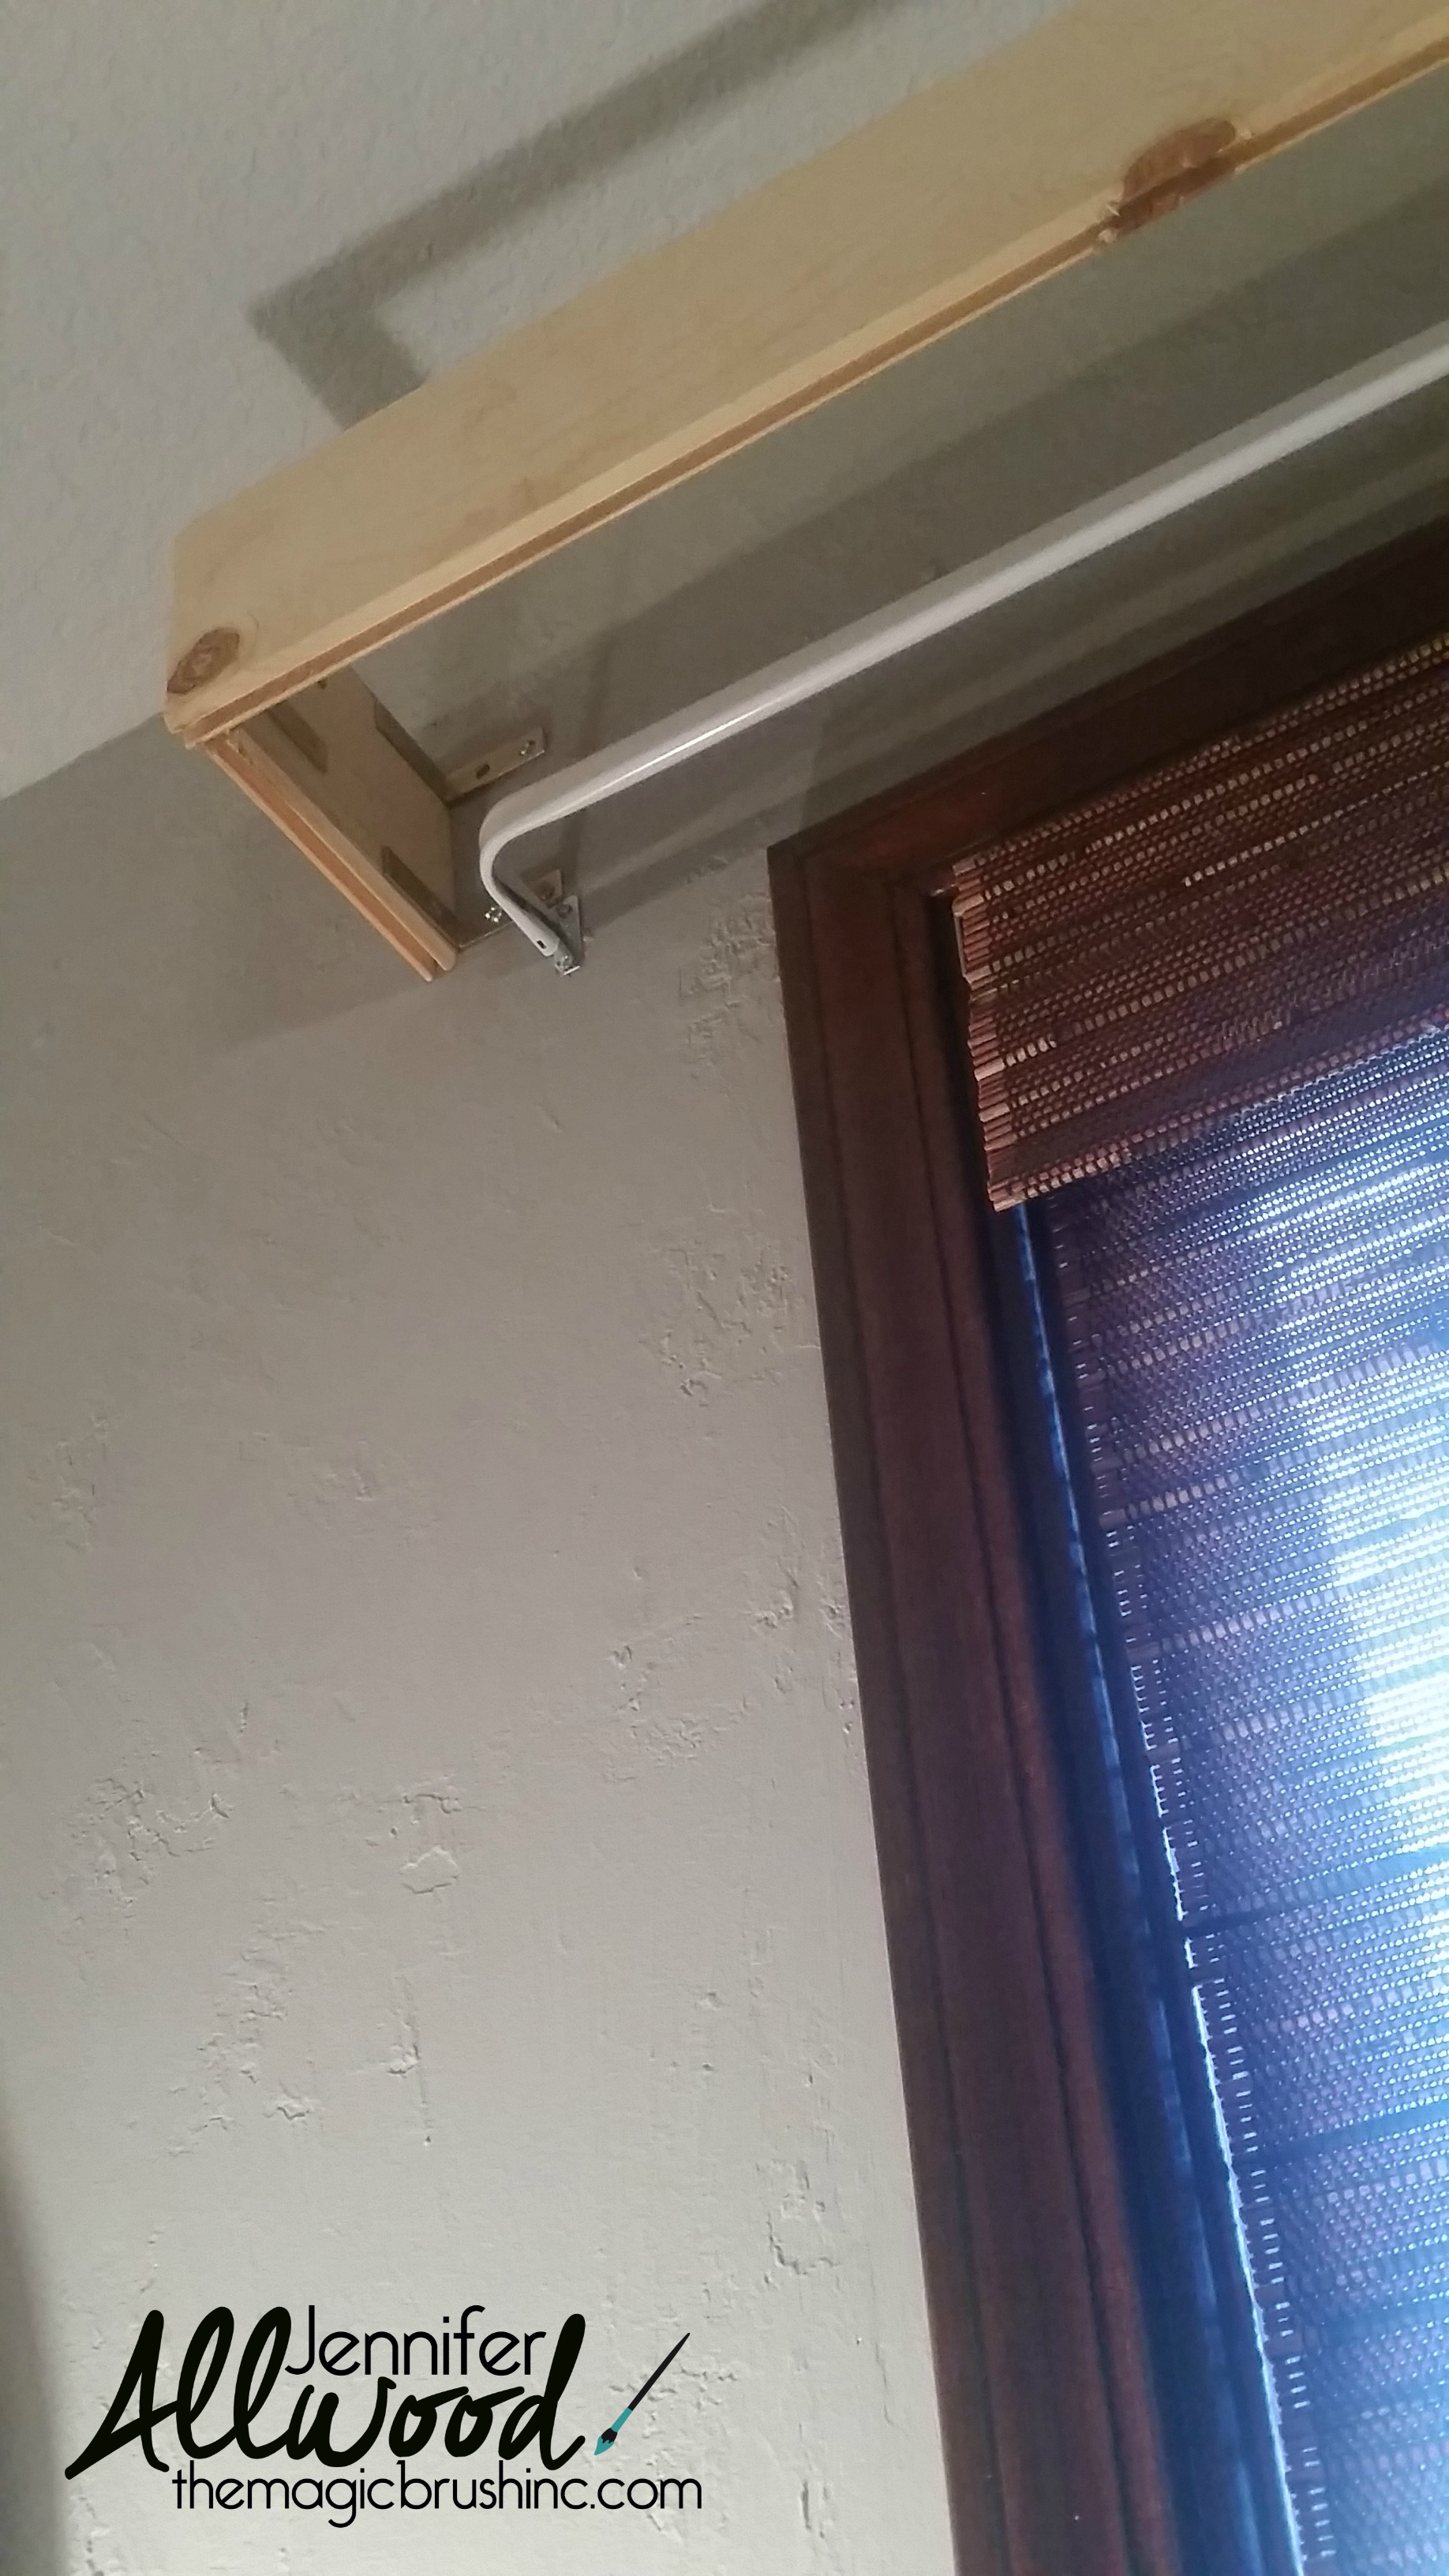
My husband, God bless him, built me a wooden cornice frame with a piece of lumber I got at Lowes. He used “L” brackets and squaring tools and other building supplies that I know not of to make this. Maybe a picture will be helpful since my description is not?

There. That helps, right? You can see here how we (and by we, I mean HE) layered it over my curtain hardware.

We had 3 tins panels that I was attempting to make look like one, so Mr Magic used garage shears to cut one piece down and to cut the pieces for the end caps. For the record, I helped measure! Lol.

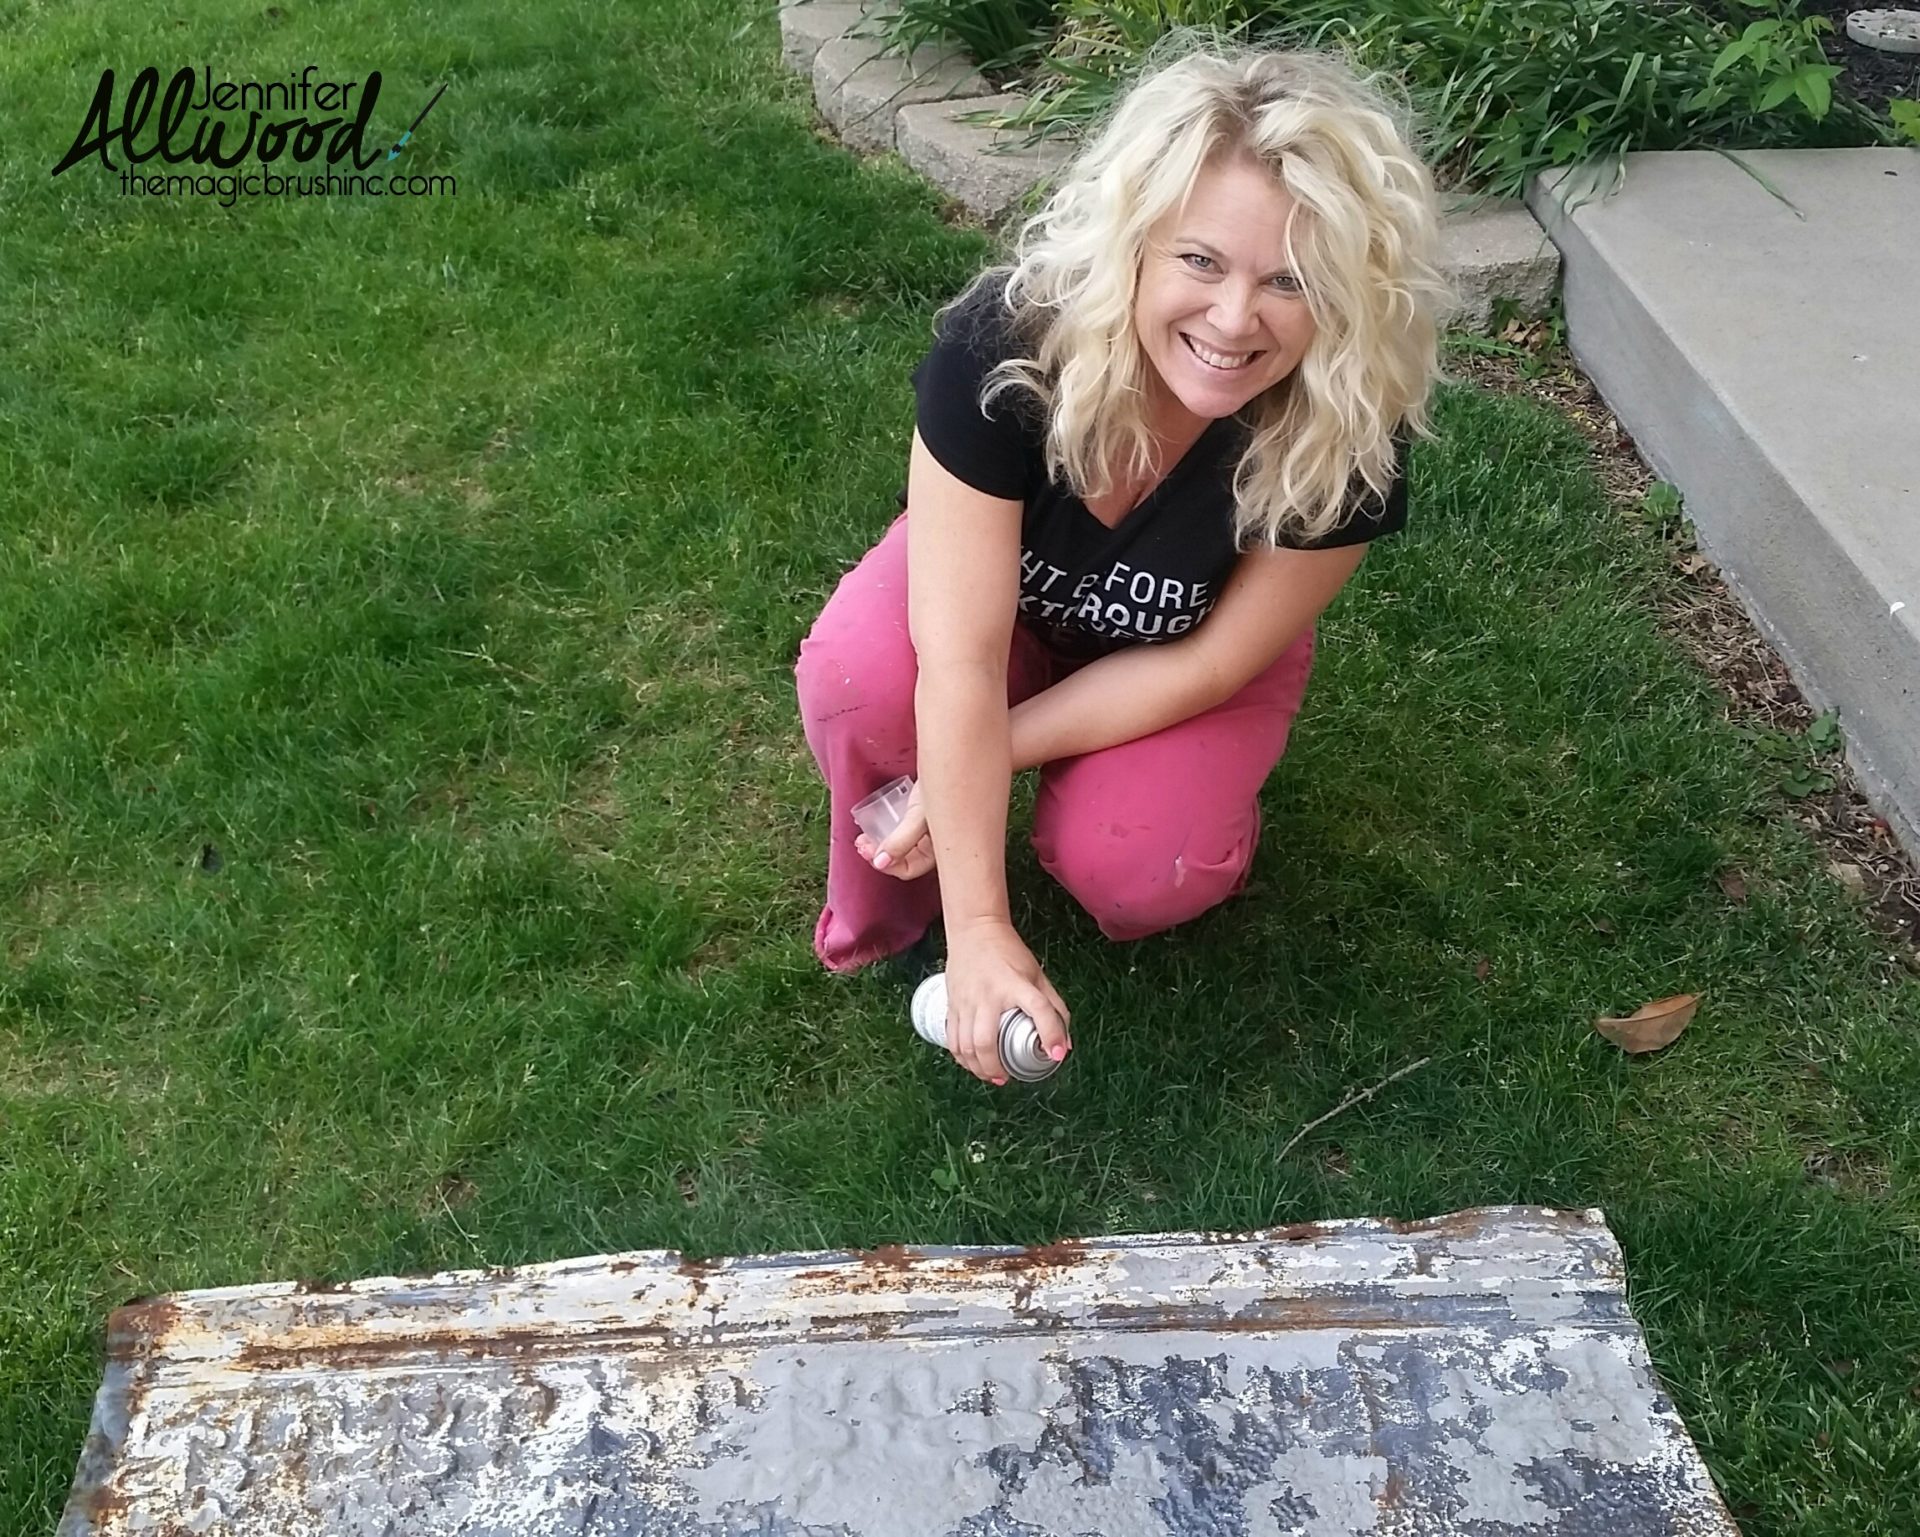
I top coated the panels to seal the rusting a bit and to keep them from flaking. It WAS a Sunday, so makeup and dropcloths over the grass were not used for this project. However, I WAS having a good 2nd-day-dirty-hair day, so I needed a picture to be taken to commemorate the moment. Ha!
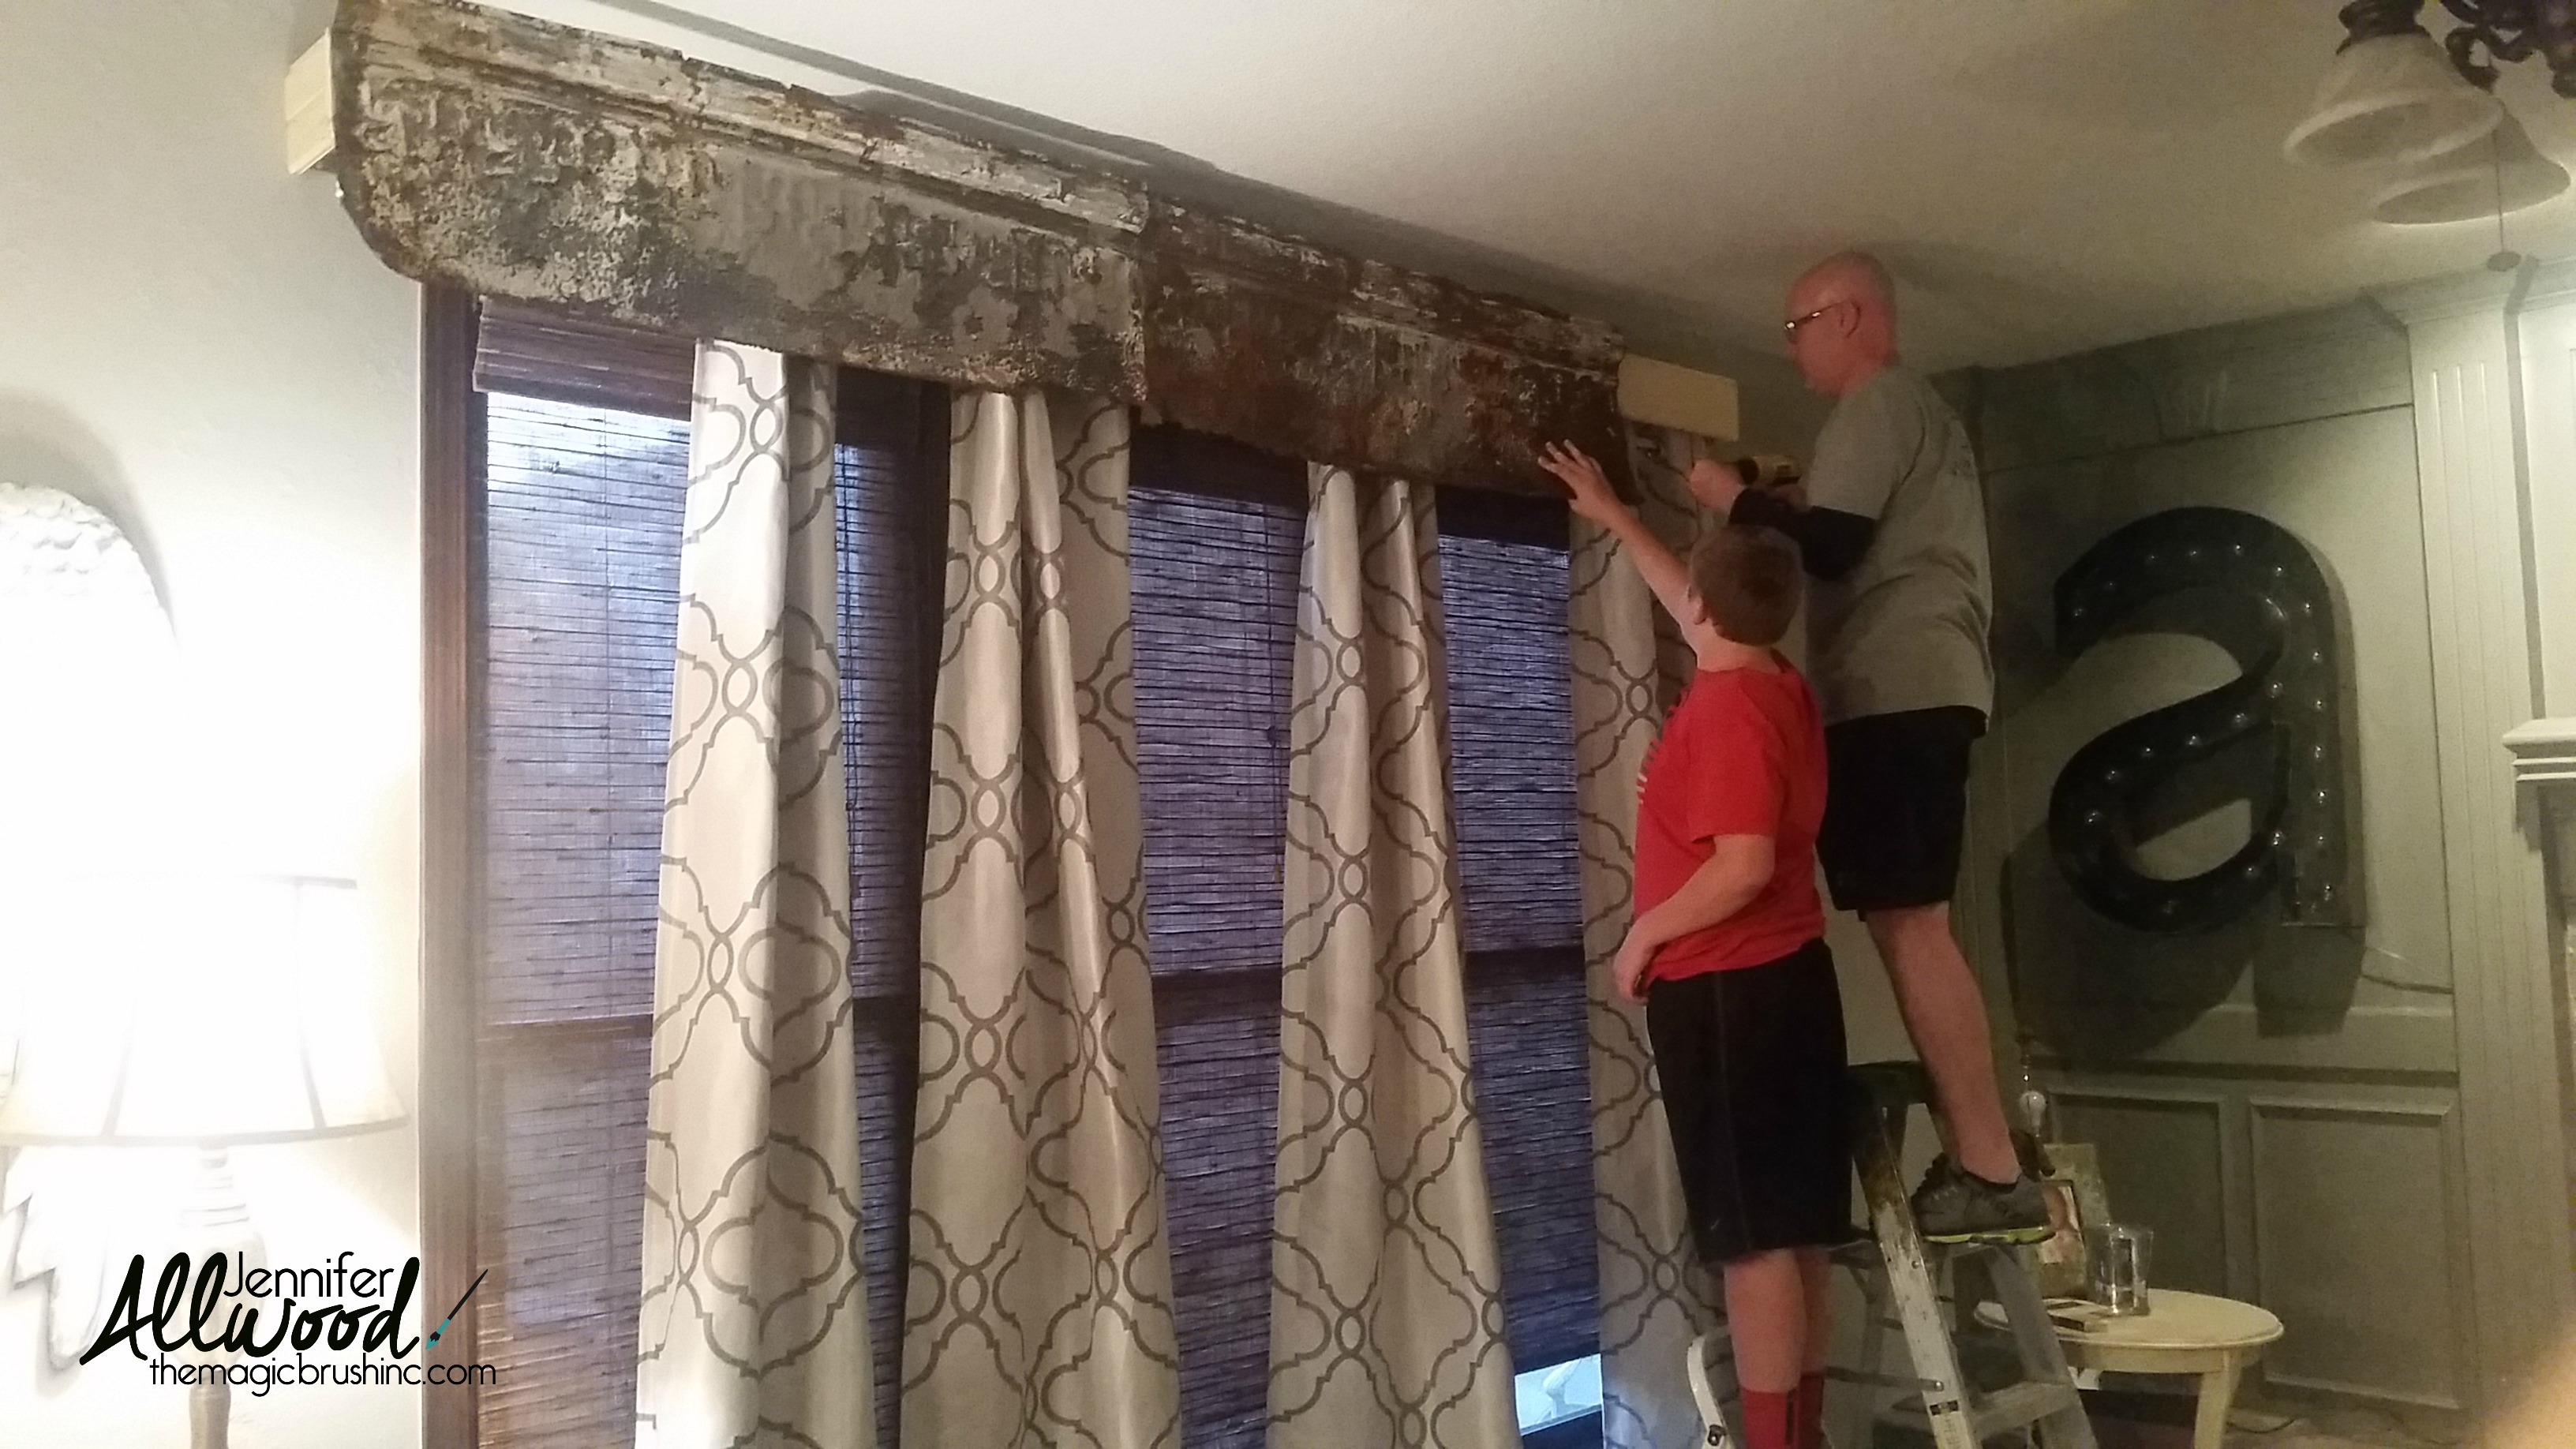
The panels were lightweight, so it was easy to drill the little screws into the wooden frame (or so my husband said). Plus we pulled our oldest son into the project. I love being able to sit back and direct my boys around! Where is my tiara when I need it???

Once we got all of the tin up, it became obvious to me that the panels would need to painted just a tiny bit in spots to blend together a little better. See how in this top photo you can tell it’s all separate pieces? So I used my wall paint (SW Ellie Gray) and a cream color to sponge some color on the end panels and the 3rd front panel to make it look more “seamless” (the bottom picture). I’m pretty darned proud of my skills here by the way. I feel like it looks like one longggggggggggg sheet of metal. Mission accomplished.

And this is the end result. Rusted tin goodness. If you are a rust hater, it’s ok. We are breakin’ up, but I DO understand that not EVERYONE sees the beauty in rust.
And on a complete side note, I do believe there is a special place in Heaven for men who do home projects like this one for their wives. Mr Magic, I know you will read this. Thank you for being the executor of all my grand ideas. God knew what He was doing when He gave me YOU. You are the best. xoxo
Blessings,
Jennifer
PS. I’d love for you to use the PIN IT button on these pics to save this to Pinterest. And if you know a fellow rust lover, share this post with them, will ya’? Us rust lovers gotta stick together!
If you’re feeling inspired to make some changes in your home, check out my free video – 10 things you can do to update your home before dinner.
22 comments
This is so amazing and rust (brownish red ) is one of my favorite colors love what you did as always though ….. thanks for sharing and the pictures are great to and helpful.
Oh my gosh… I ADORE THIS! PINNING! 🙂
where did your curtains come from?
I LOVE THIS!!!! I have been racking my brain to find a window enhancement
Without curtains ( hate the dust) to my french country dining area and this will be perfect! I think I may try bending the metal if the piece is long enough instead of cutting so there are no seams. Thank u for sharing! Best idea ever.
This project is amazing. You and your hubby did a wonderful job. Looks great. I am totally inspired to do something similar in my 100 yr old tiny farmhouse. I have had the rusty Victorian metal strips for years just laying in my shed. Now I am inspired. Thanks.
Jennifer,
Love the cornice board of tin.
I saw your post of the Three stacked pumpkins with grapevines, leaves etc. I have been looking for it for days because I have gone out and bought all the supplies and want to make it. Can you tell me where I can find it. I would be most grateful.
I am having trouble finding your posts, please help me. I did make a a flag from old wood. Since my home inside has a Carribean theme I glued star fish to the flag for my stars.
oh, my I love it! I saw your feature on Funky Junk & had to check it out! Turned out awesome!
Oh my, am in love! LOVE, LOVE, LOVE IT! I love the whole room. Rust and bling go together like peanut butter and jelly. A perfect companion to one another. I am new to your site, but am looking forward to more. Thank you.