Jennifer Allwood Home
  • Home
  • Amazon Picks
  • Shop my Instagram
  • New House
  • Old House
  • Hair
  • Recipes
  • Adoption
Jennifer Allwood Home
  • Home
  • All Posts
  • Amazon Picks
  • Shop My Instagram
  • Boujee on the Beach
  • Boujee in the Desert
  • Boujee on Miramar Beach
  • All Posts
  • Allwood
  • cabinets
  • decorating
  • DIY Projects
  • do it yourself
  • furniture
  • jennifer-allwood-home

Bath CADDY? Bath SHELF? Bath TRAY? Toy holder??????

  • August 26, 2015
Total
2
Shares
0
0
2

bath caddy done

A while back I mentioned to Mr. Magic that I would LOVE to have a bath caddy or bath tray made to go over our bathtub.  Because he is amazing at interpreting my “hints” as what they really are…. “requests”, he made it happen.  But I was a little shocked at how!  He may be genius!  I should marry that man.


bath caddy |The Magic Brush

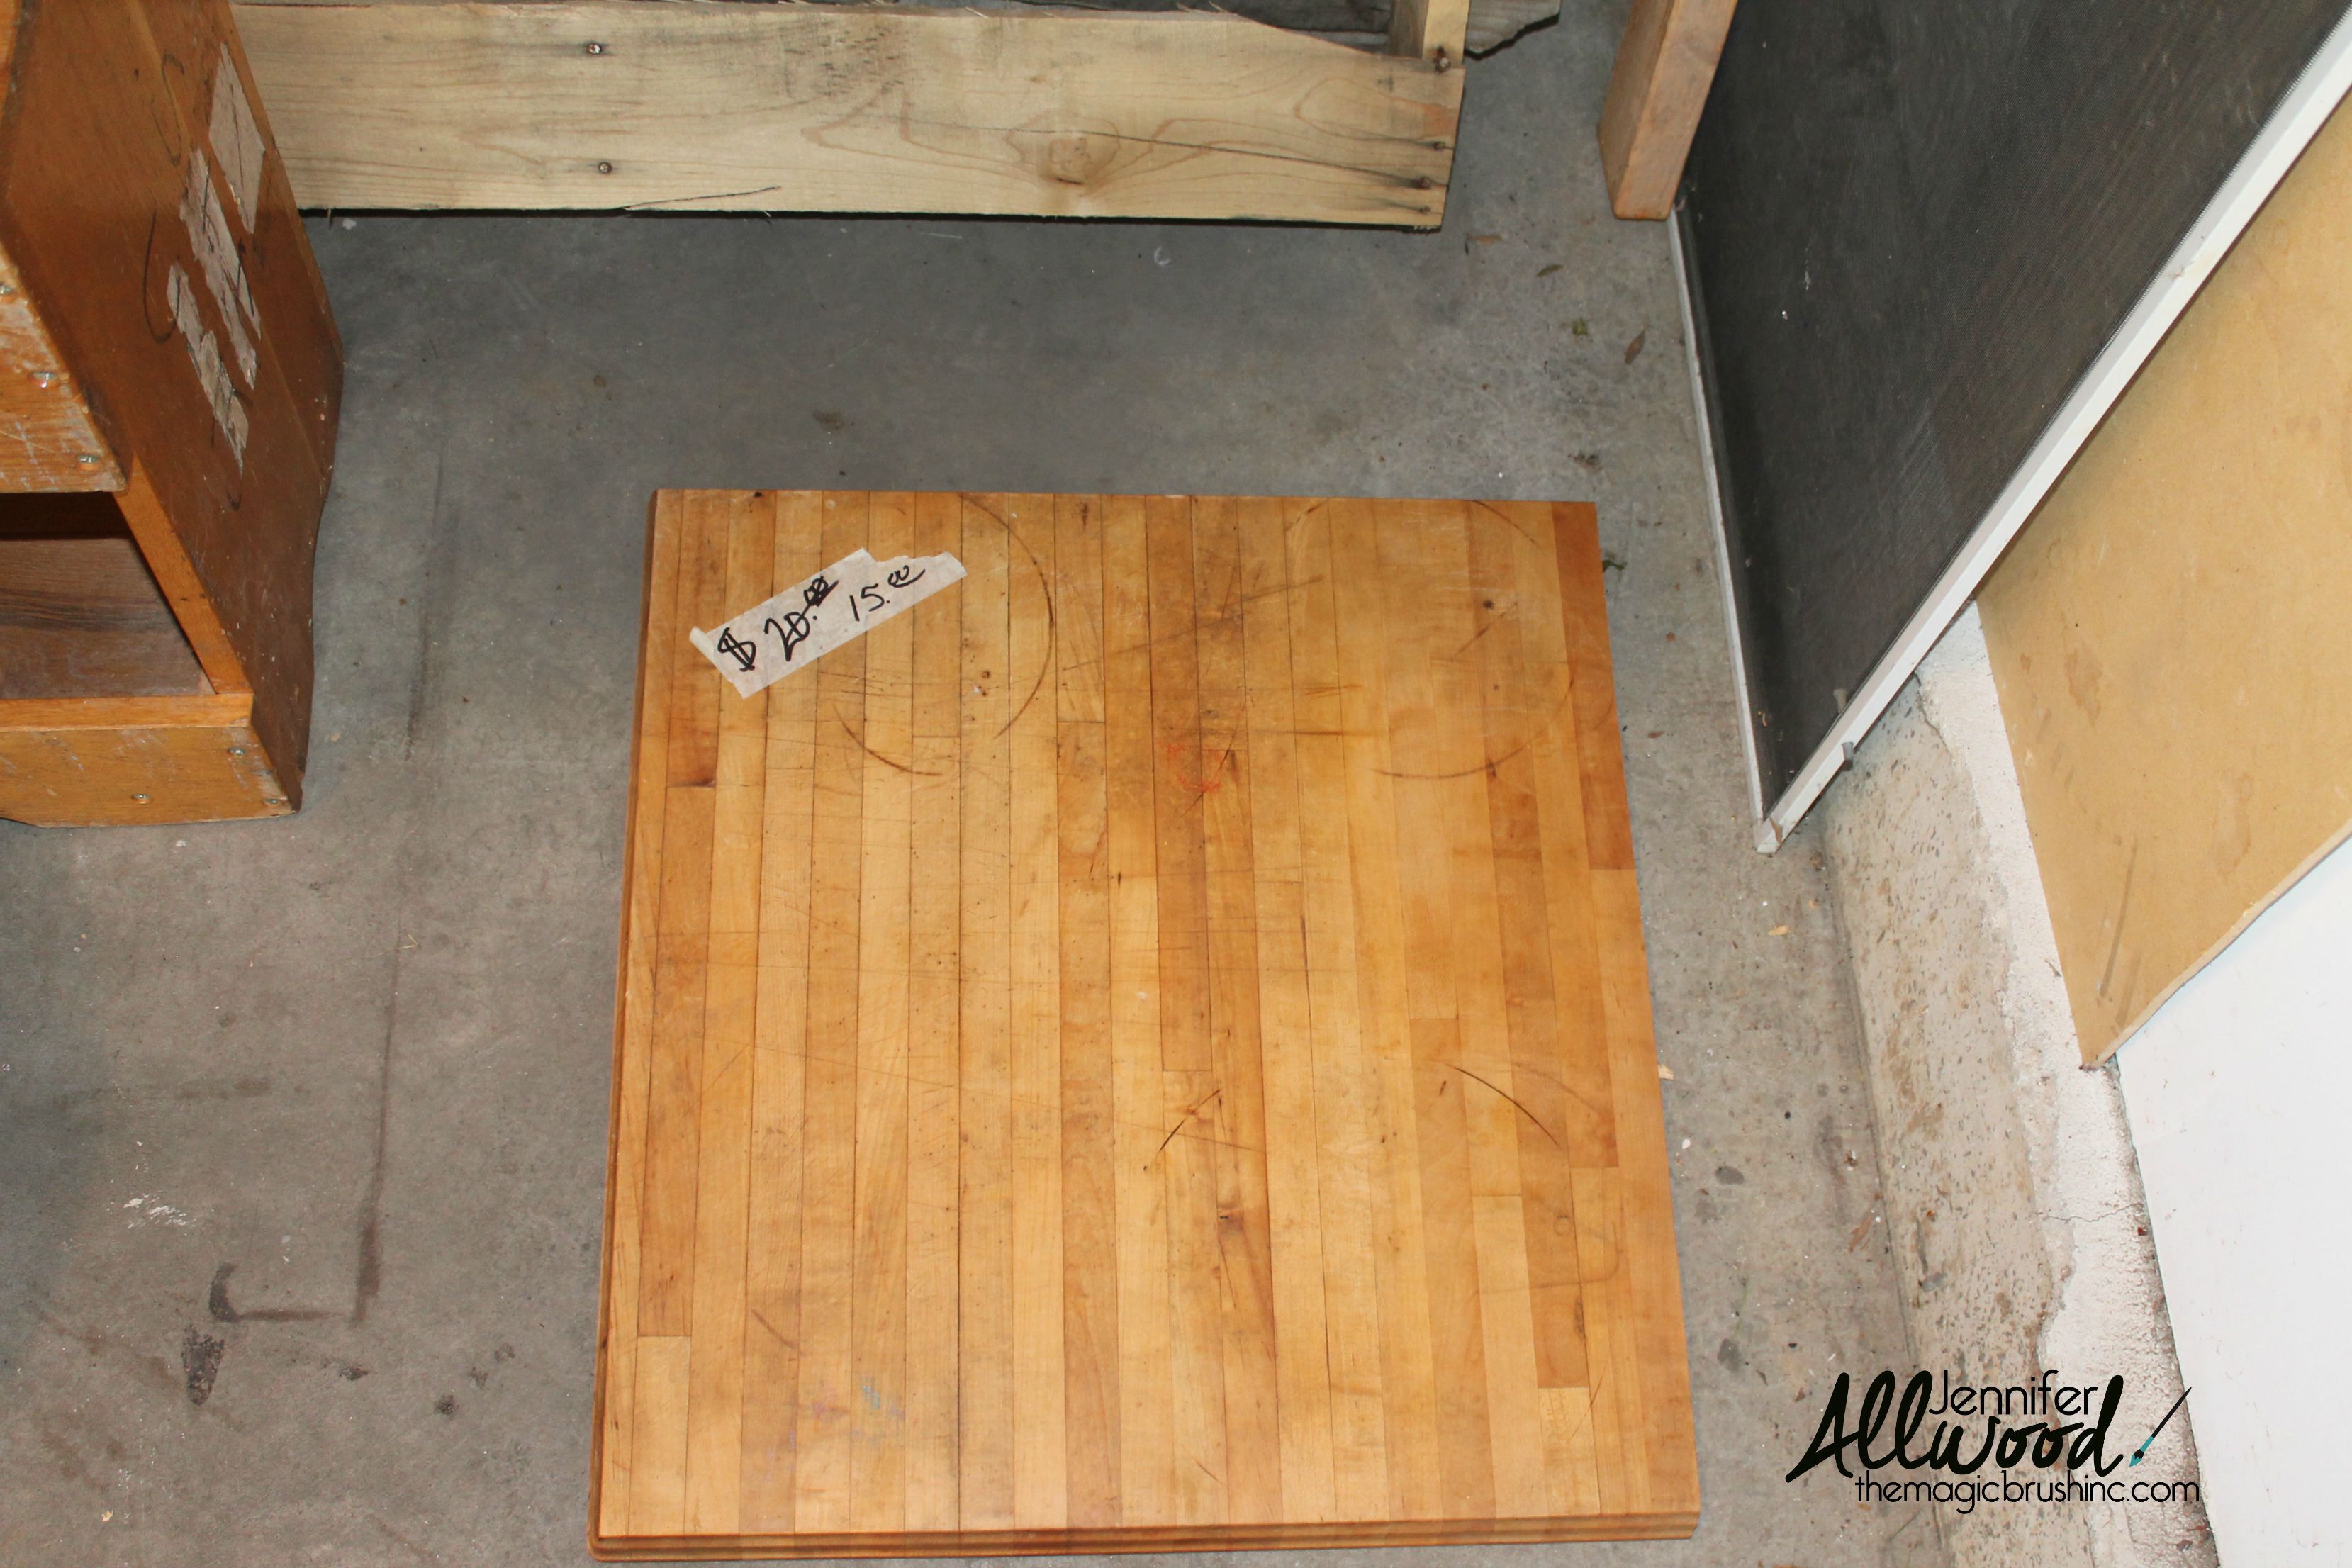
He came home one day with this kitchen cutting board (butcher block) that he got from a local Restore in Kansas City.  It was not long enough to go the long way across  the tub as a bath caddy, so he had to engineer it a little.  First, we cut the block right up the center WITH the strips of wood.


bath caddy drilling dowels |The Magic Brush

Then, he drilled holes into the edges of both pieces so he could use a dowel rod to connect them together into one long bath caddy piece.


bath caddy in half |The Magic Brush

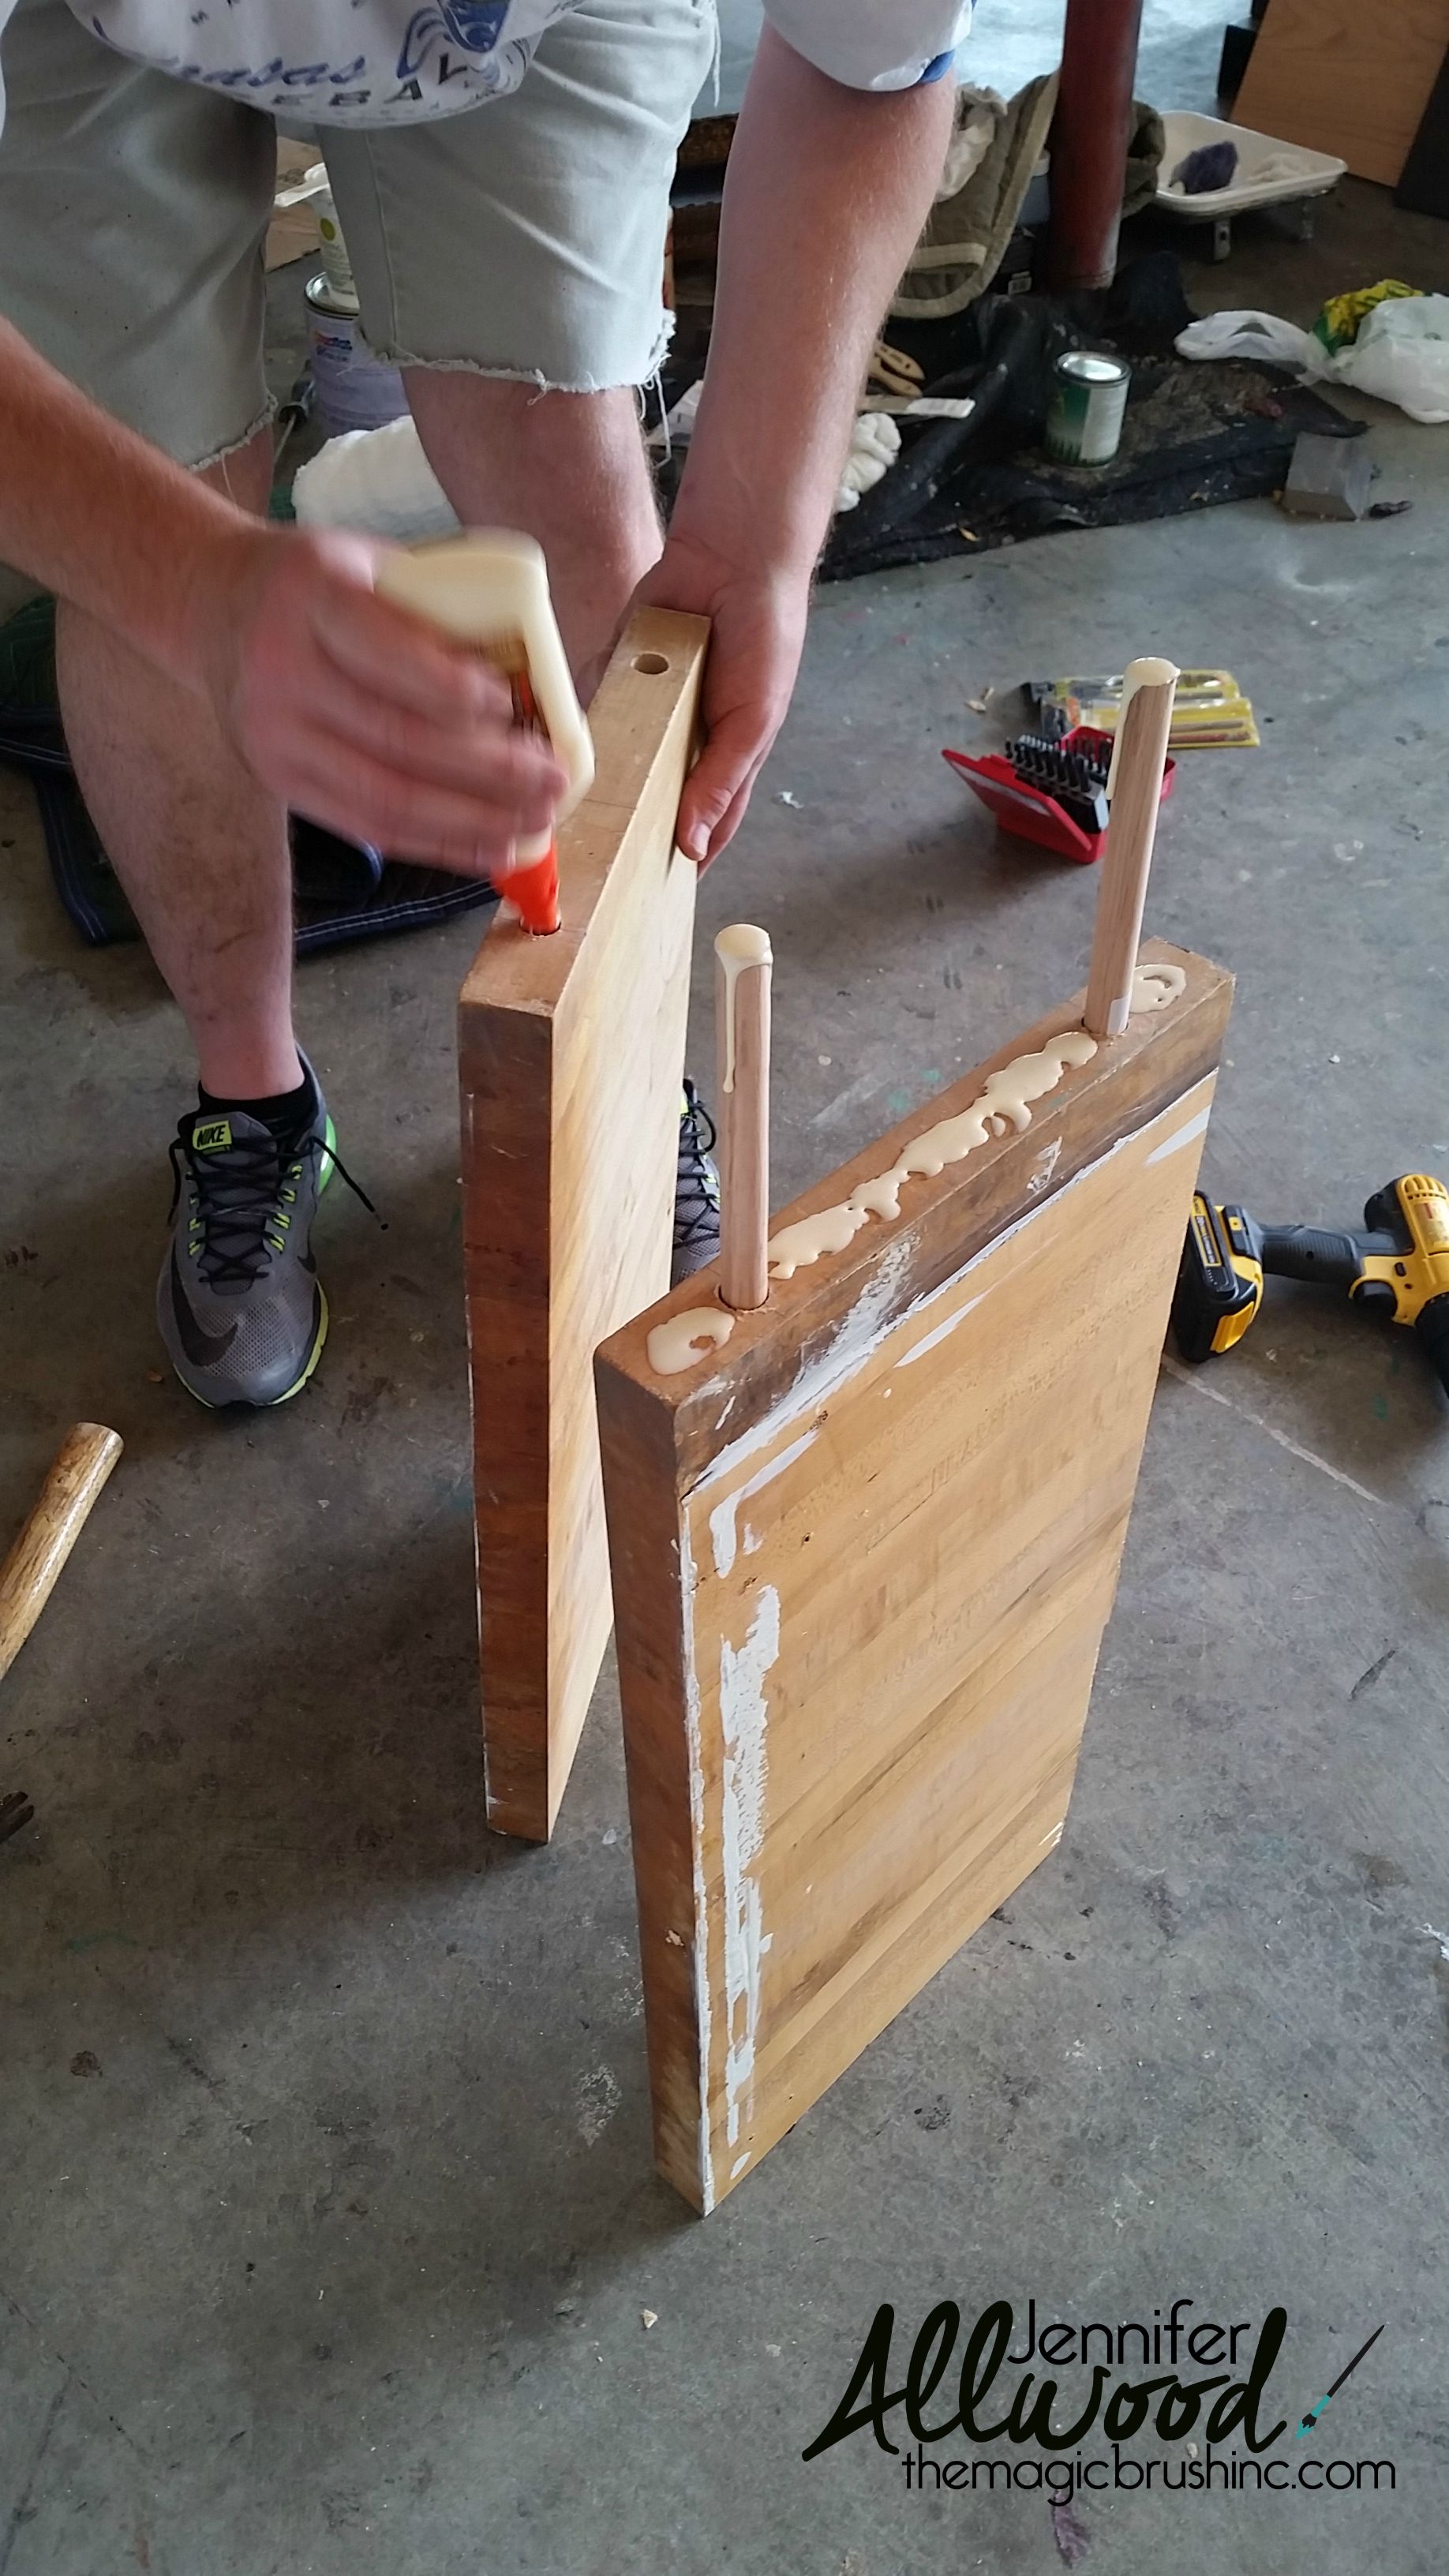
He used wood glue in the holes and on the edges of the pieces to give additional support.  He used a wood clamp to put the 2 pieces together overnight.  He failed to take a picture of the clamps and for that, he is grounded. ha!


bath tray stain | the Magic Brush

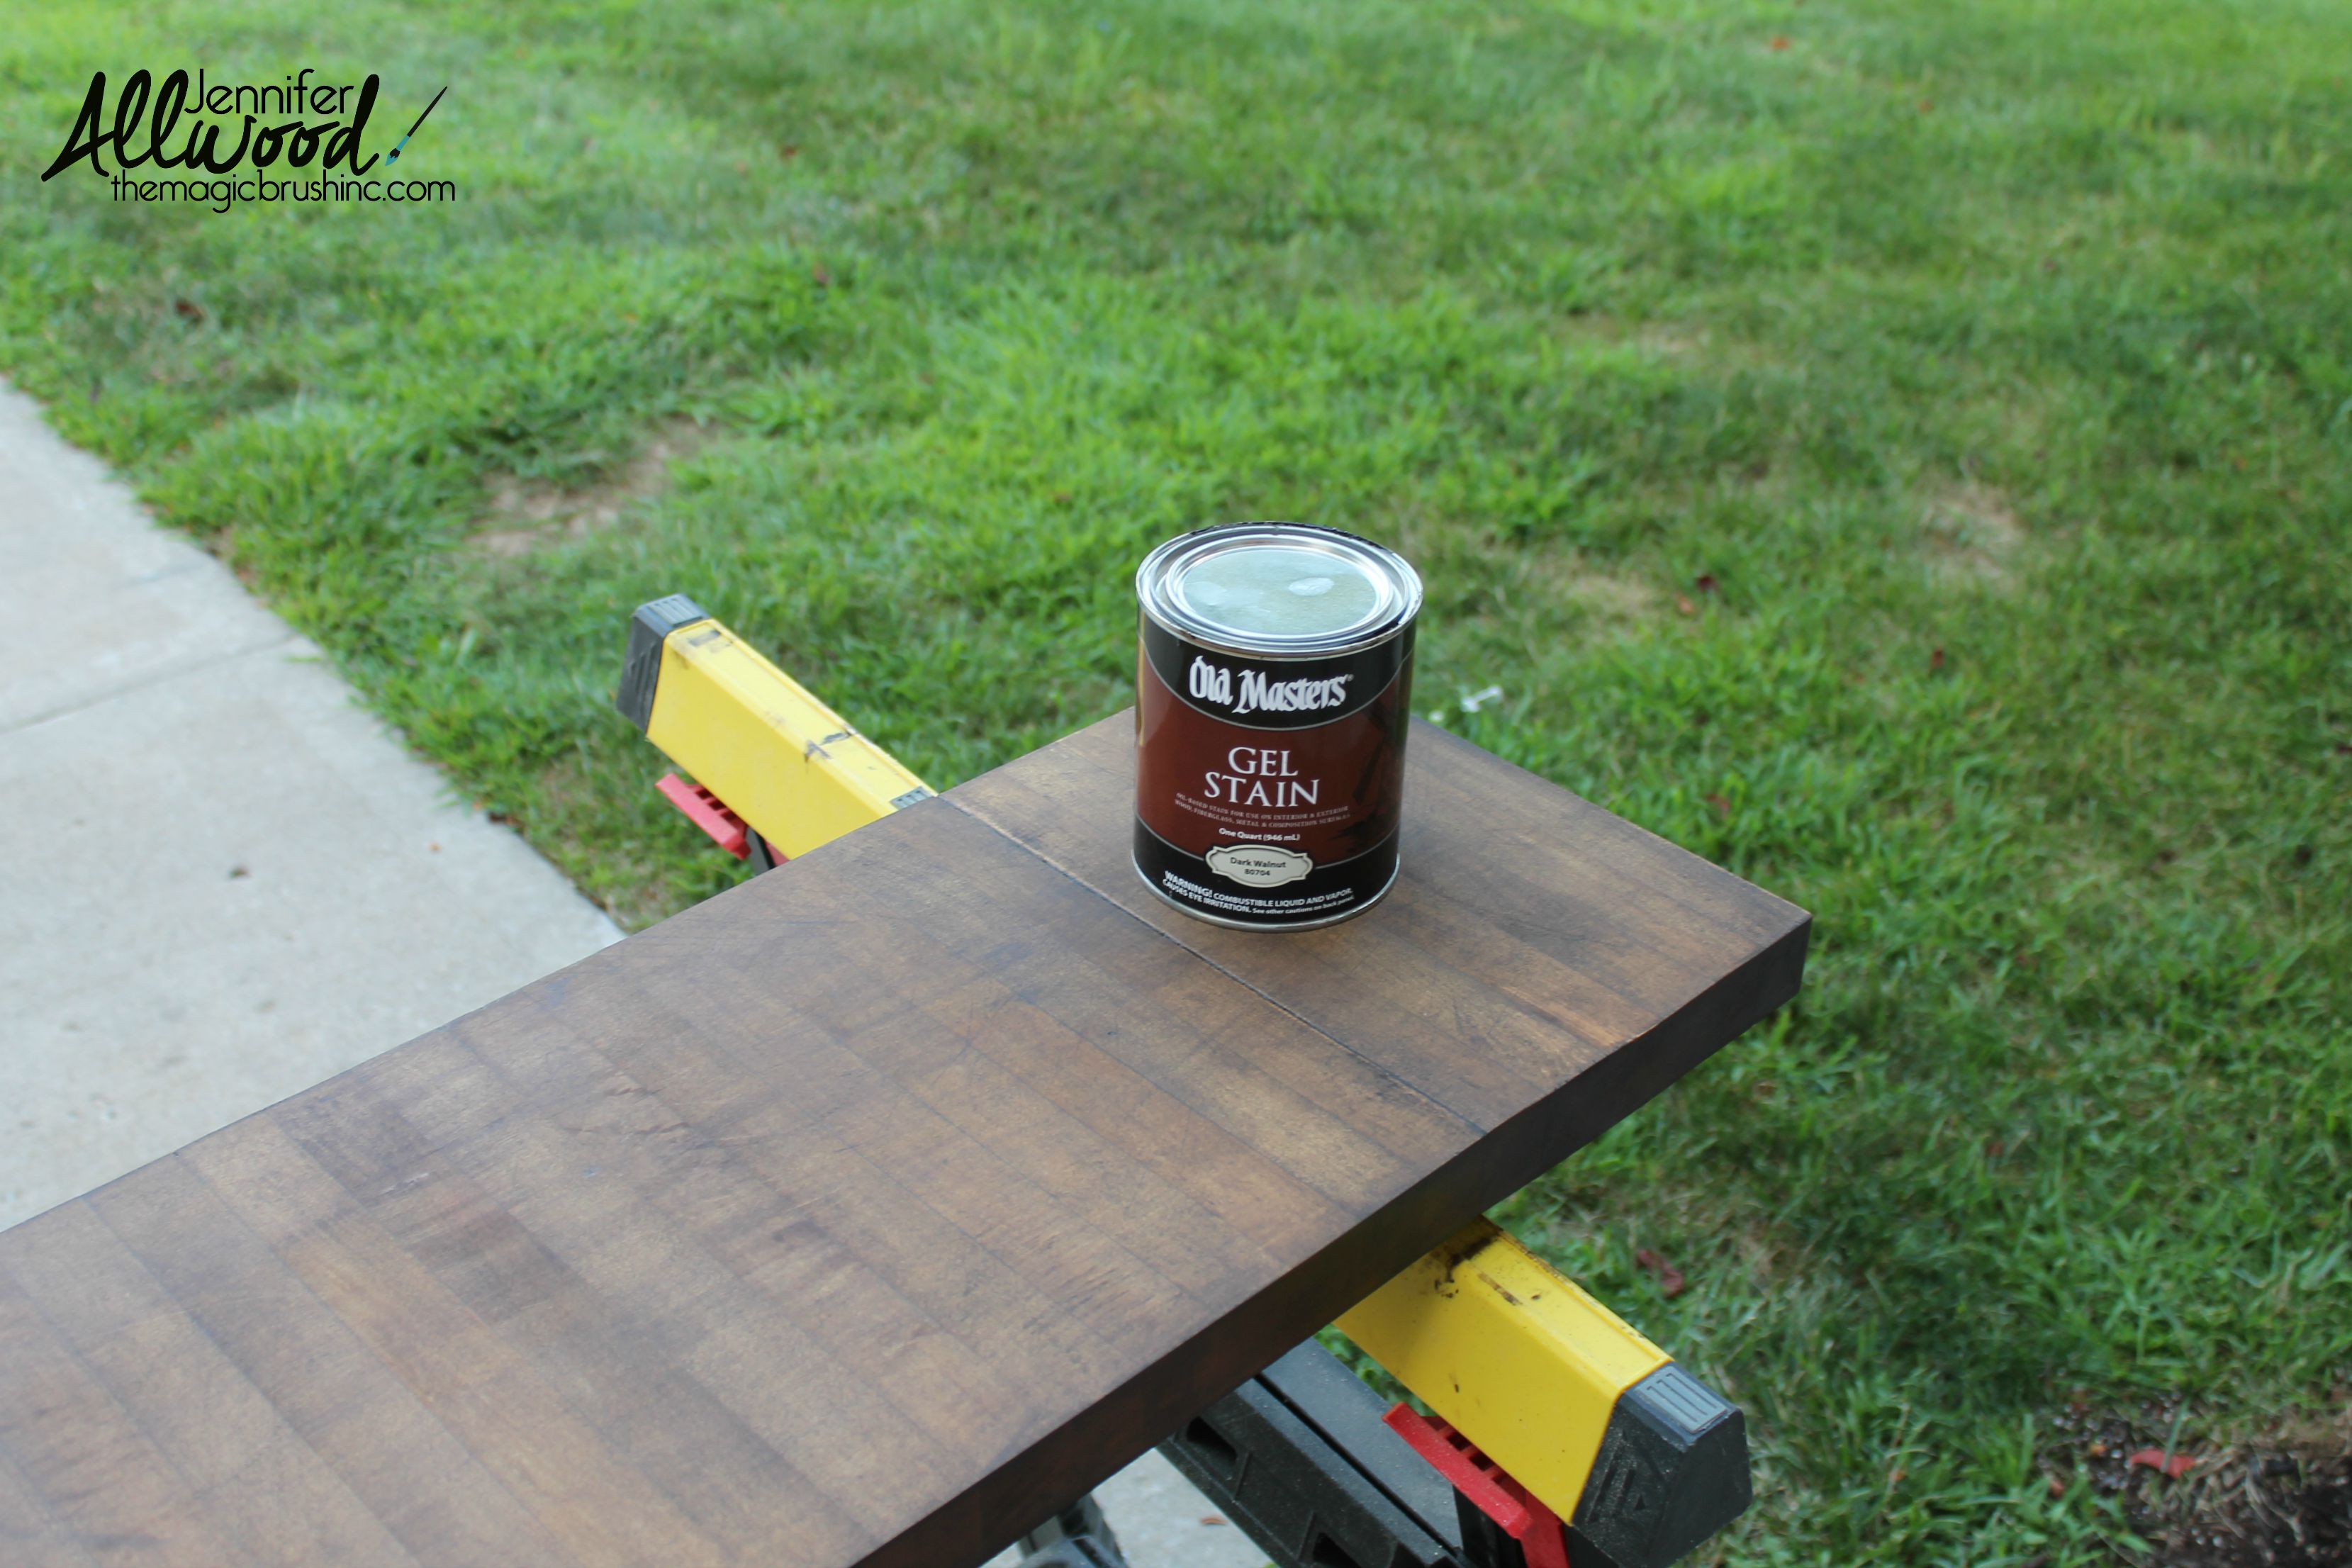
And then he stained it.  I didn’t stain it… HE DID.  I taught him so well!!!  We used Old Masters gel stain in Dark Walnut because the color is always perfect.  He wiped it on with a rag.  After it dried, he used marine (spar) varnish as the topcoat.  We figured if it’s good enough to protect a boat against water, it can certainly stand up to our bathtub splashing.


bath caddy broken | the Magic Brush

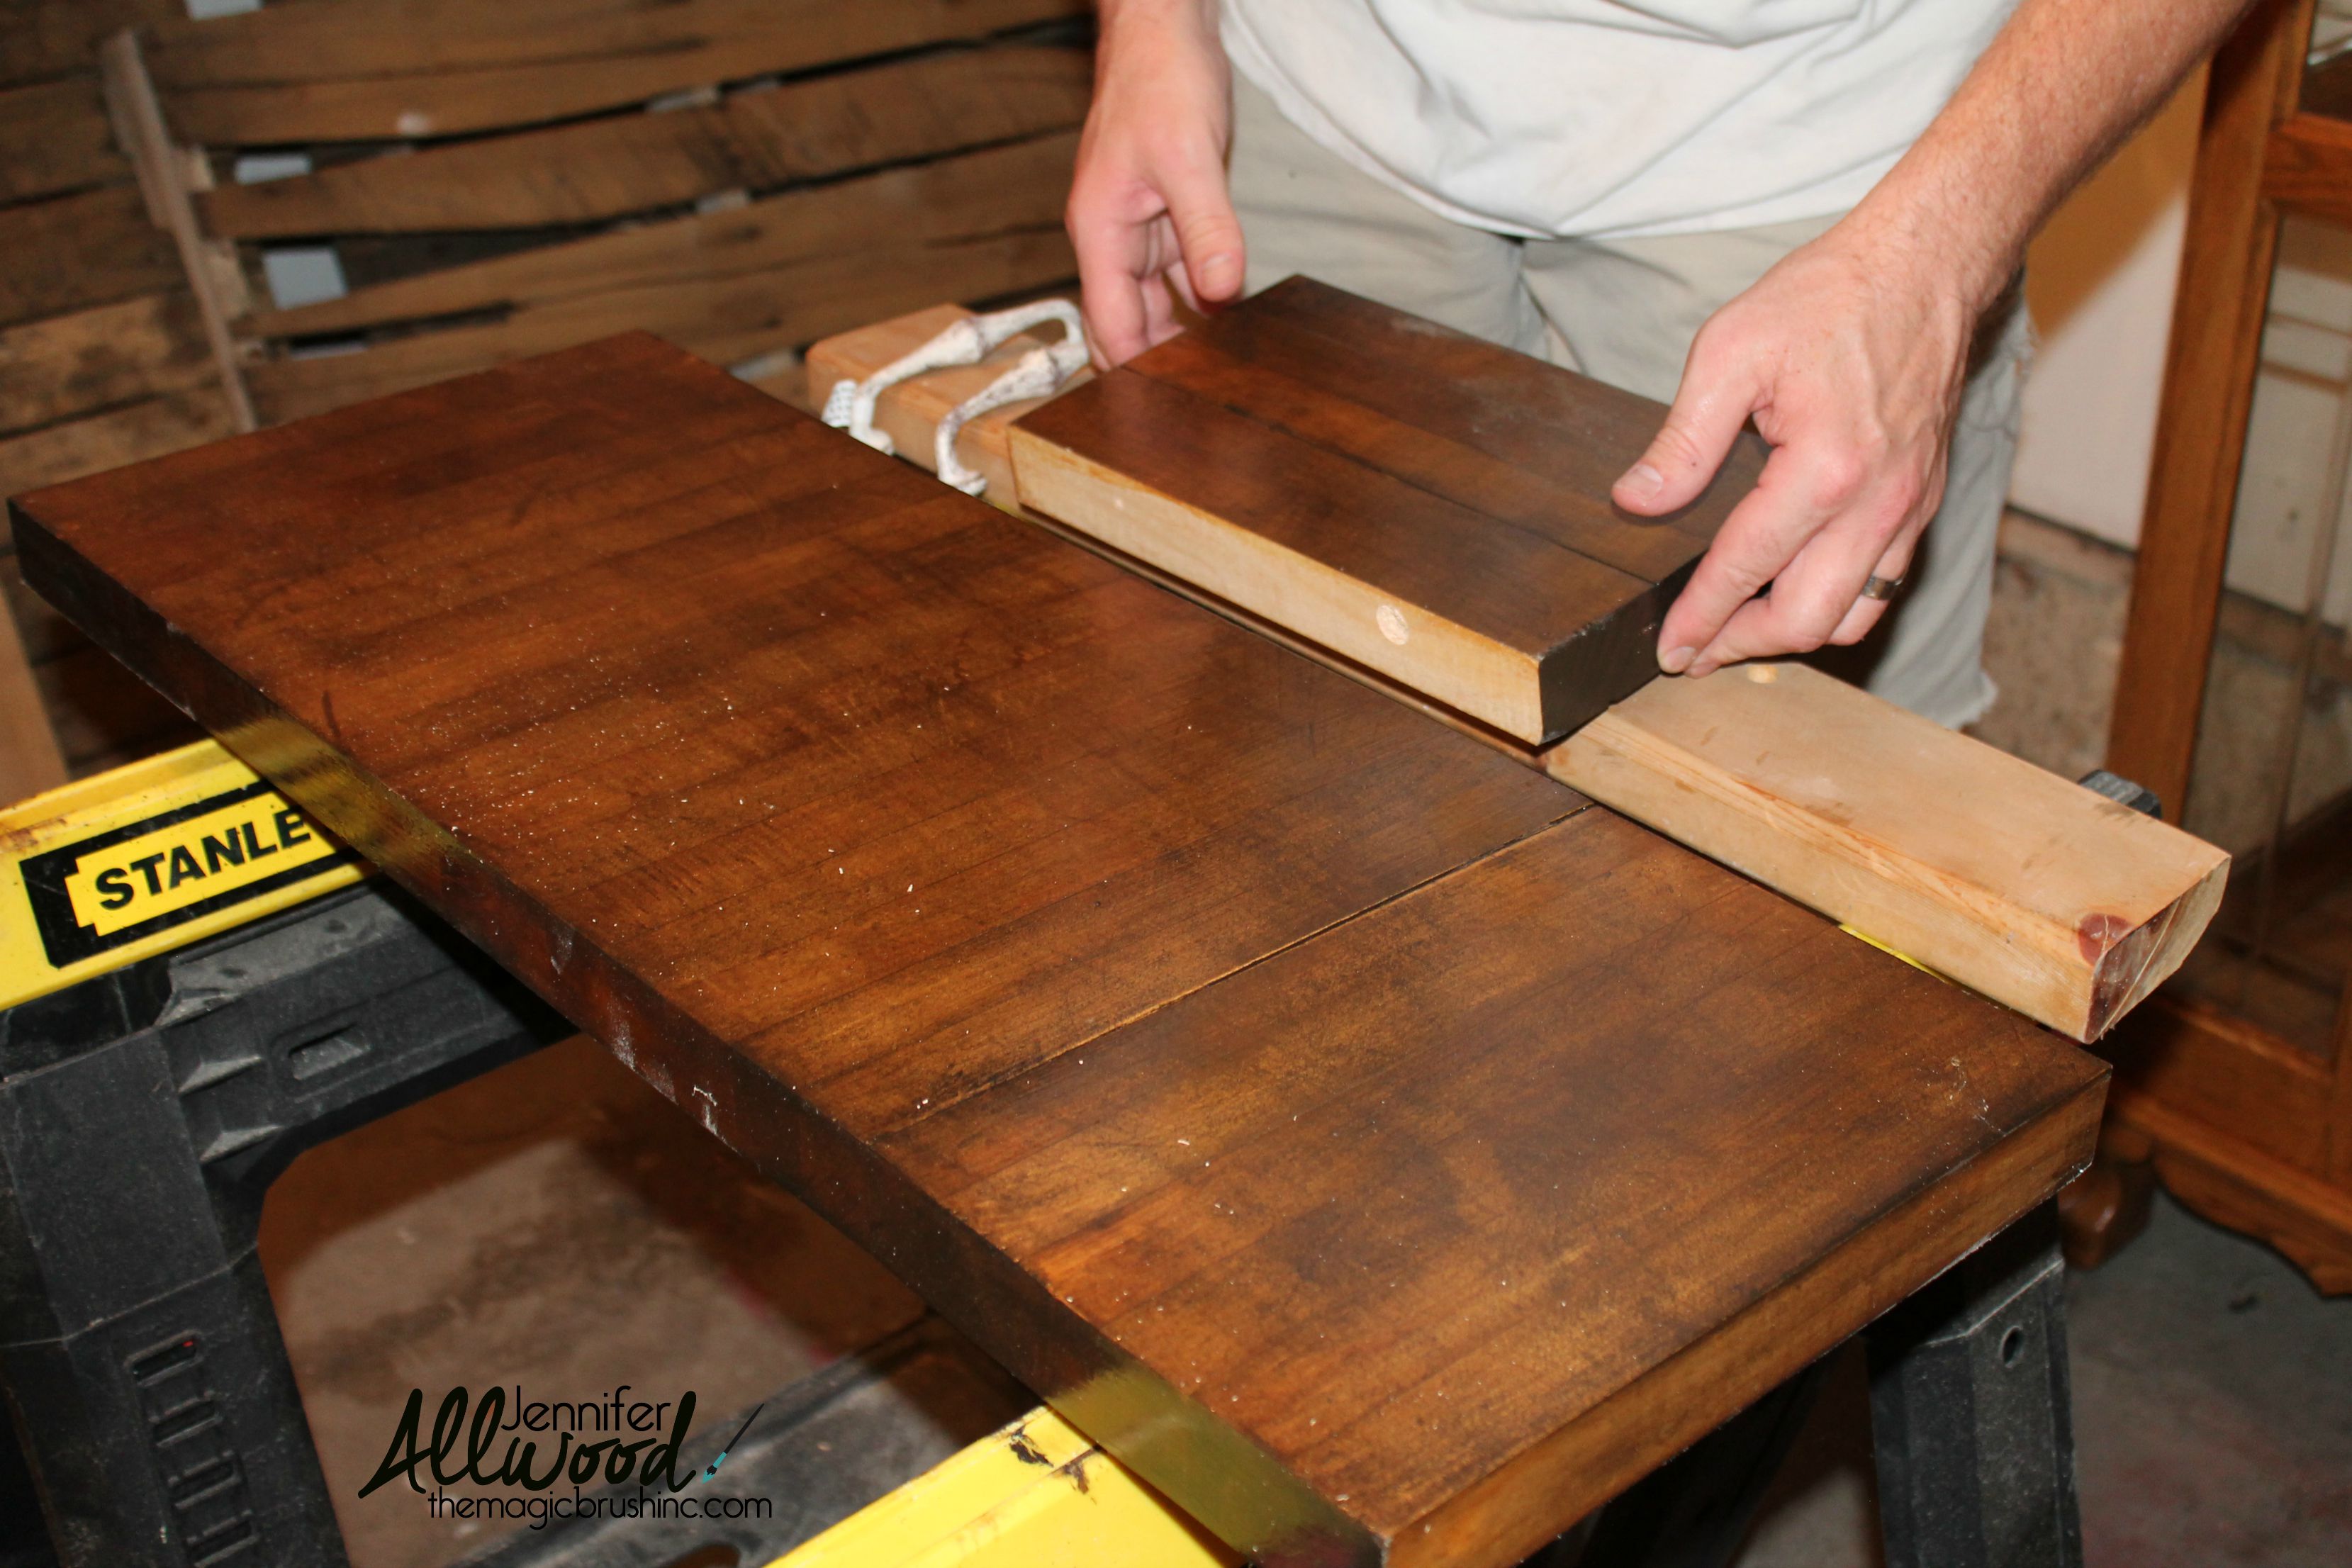
And then, tragedy.  Somehow the bath caddy tray got dropped and it snapped off a section of the tray.  Grrrrrrrrrrrr.  There was weeping and gnashing of teeth.  But in hindsight it was actually good because better to snap HERE than in the tub and on someone.  Can you imagine?  OUCH!


bath caddy underside | the Magic Brush

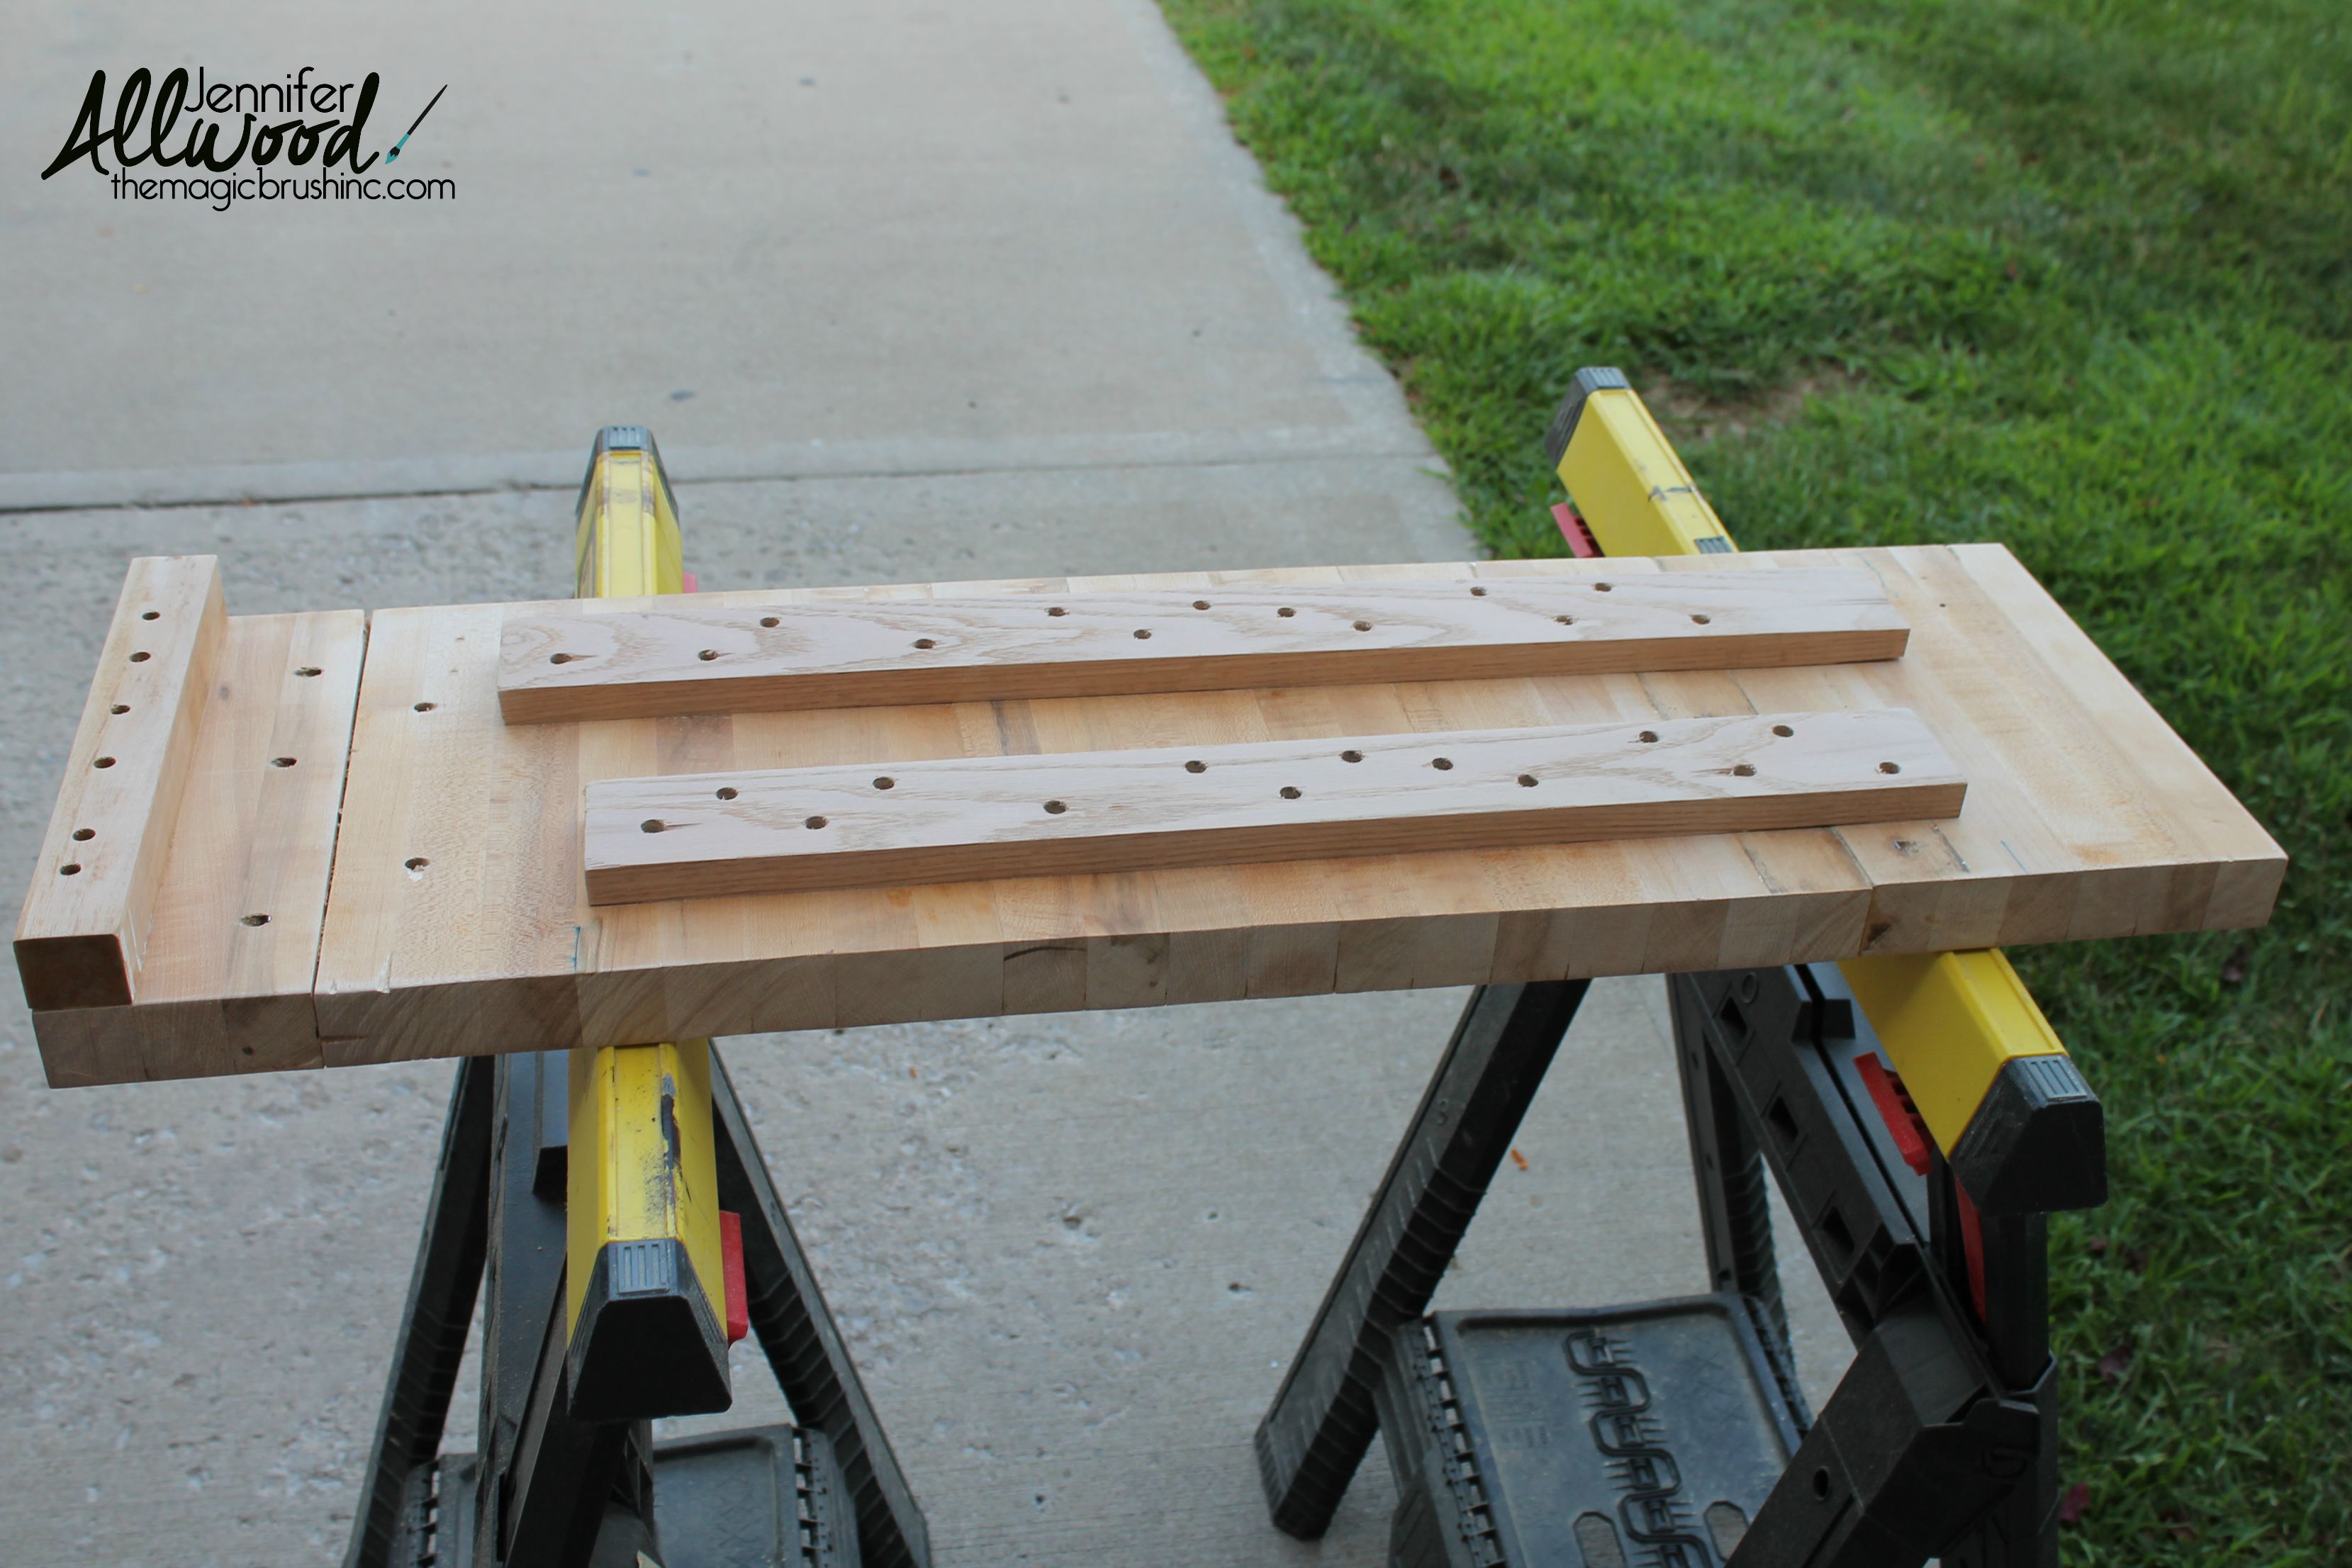
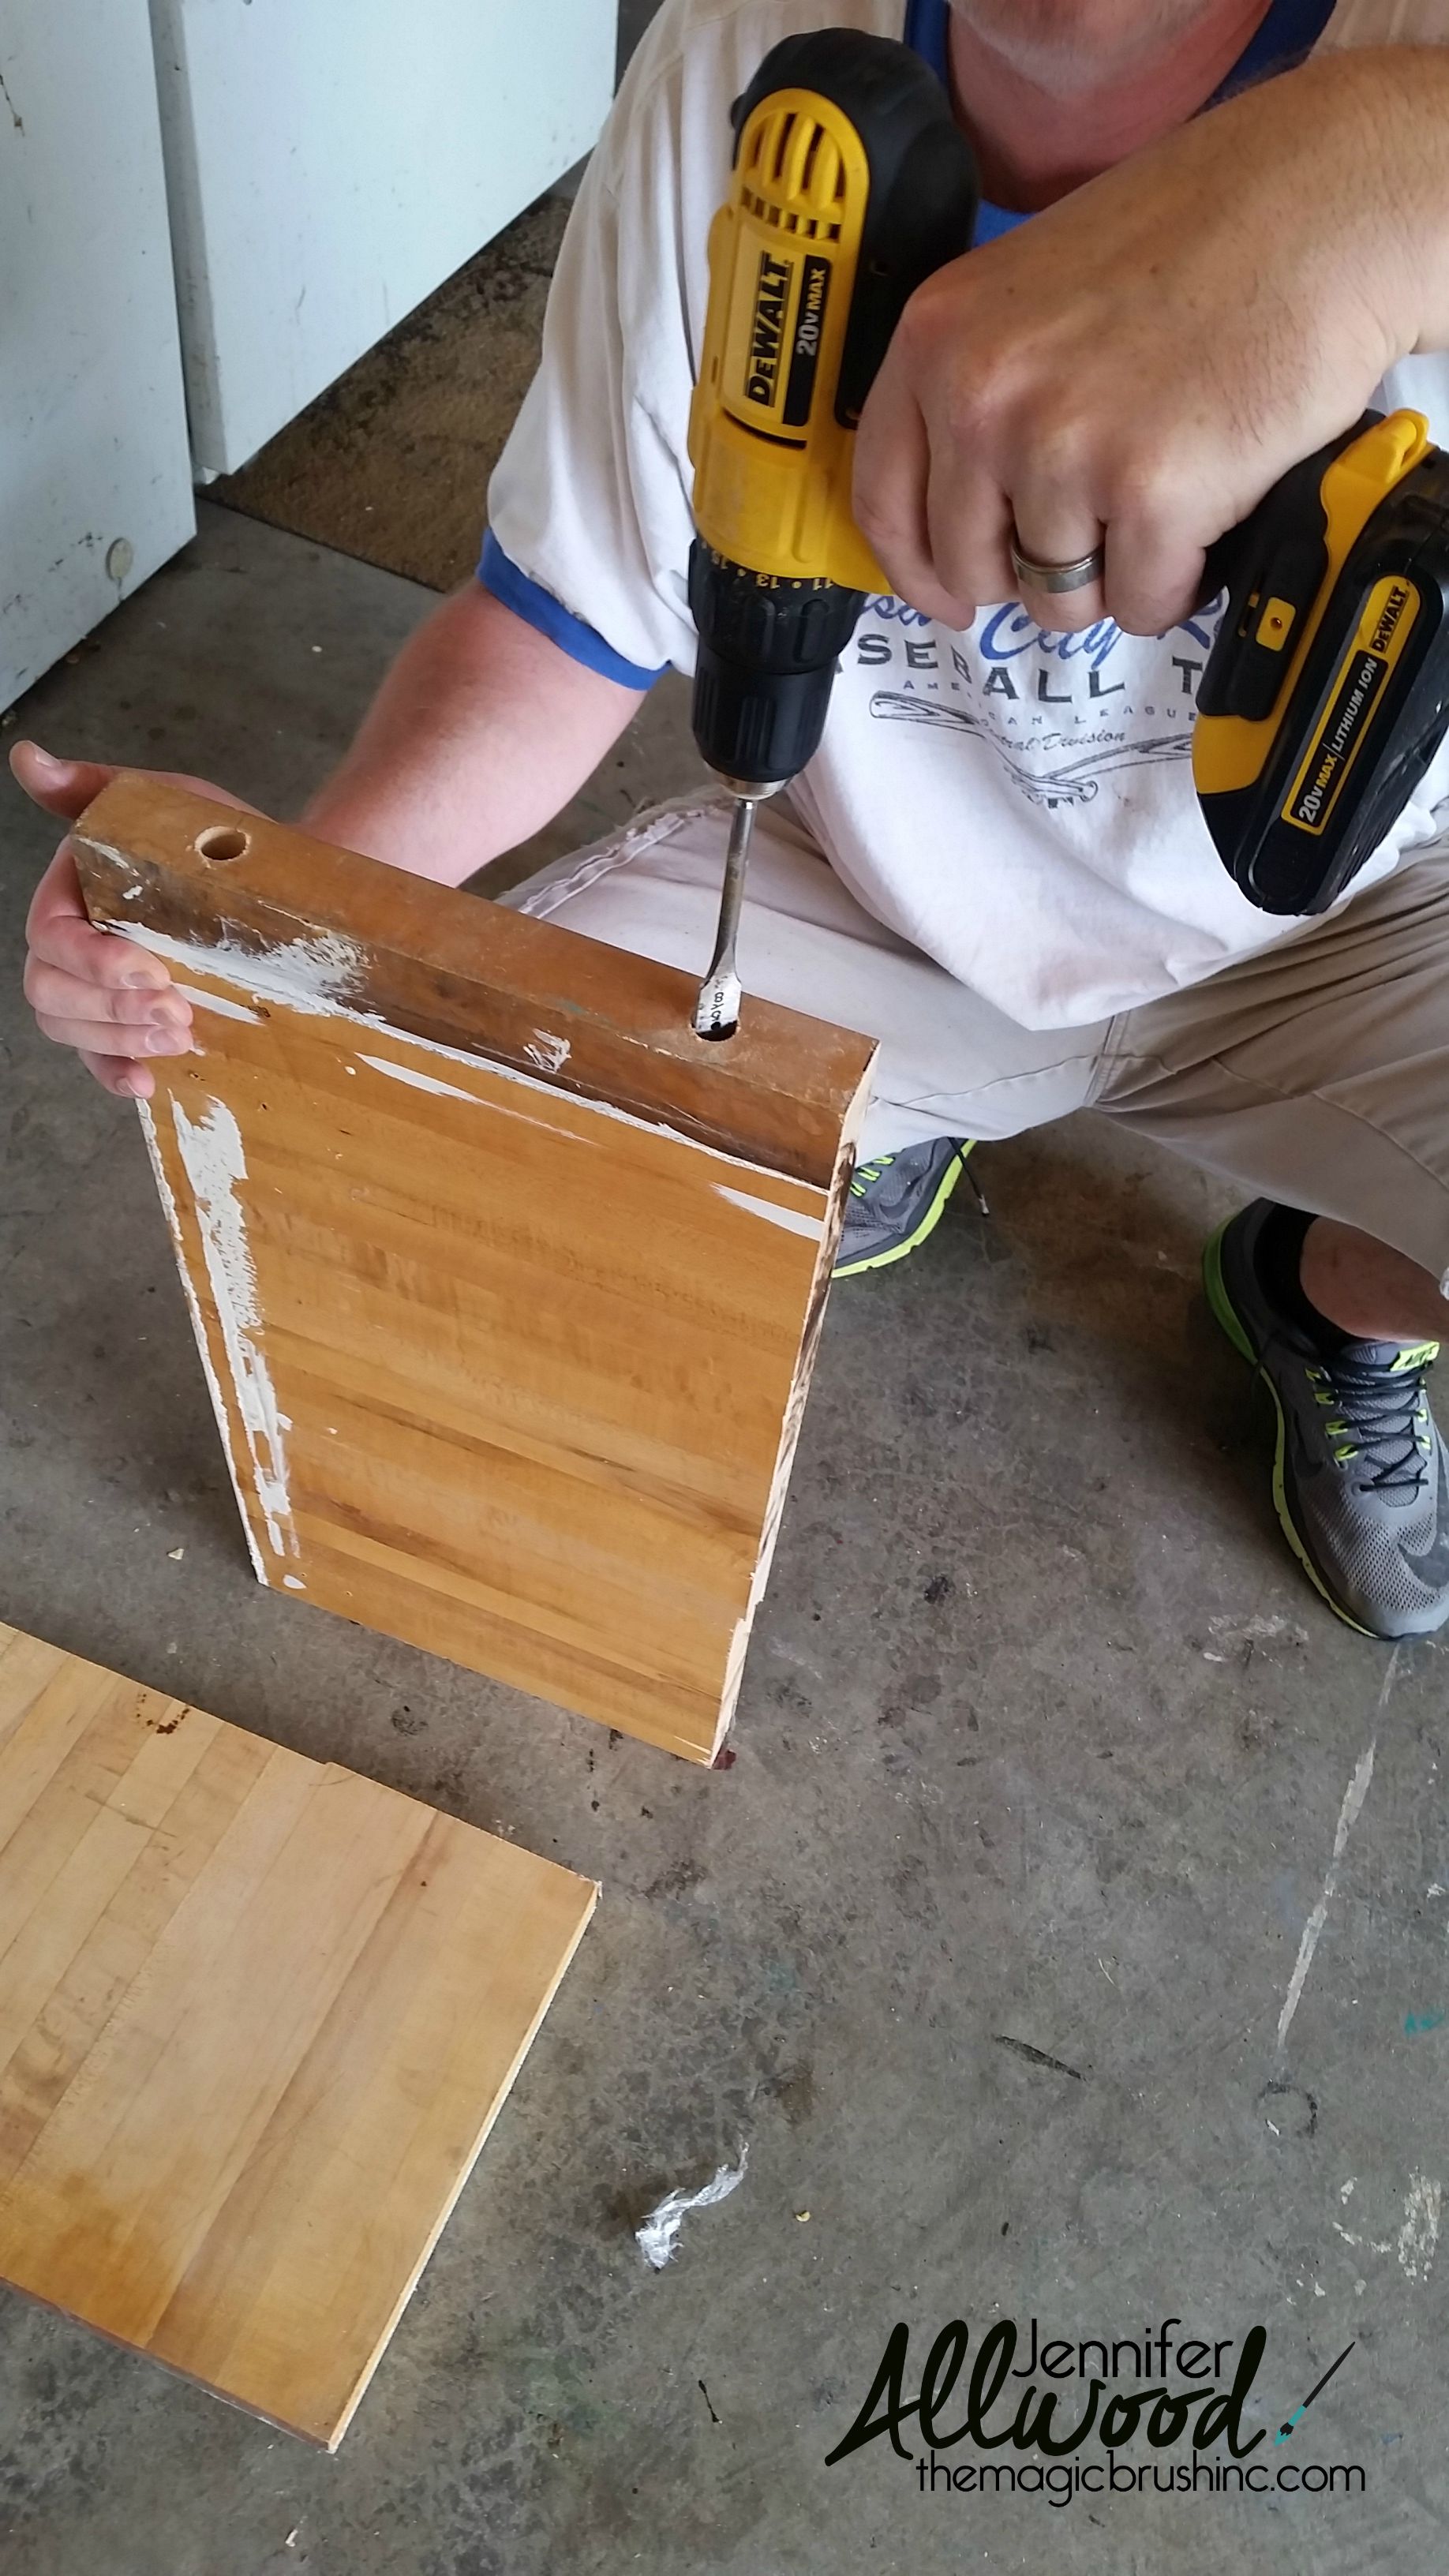
Many of you saw this pic on my Magic Brush Facebook page with super fun guesses as to what it was.  You all have vivid imaginations…. I love it! But this is the fix that Mr. Magic came up with.  He drilled boards onto the bottom of the tray going across the wood.  Not so pretty, but it works!  Listen, we are not “fancy on the bottom of projects” type of people.  We are “look good on the top” kind of people, so if this fix bothers you, we couldn’t do projects with you. Ha!  Also, I know you are wondering why the pieces Mr Magic drilled across the bottom don’t go all the way across the bath caddy?  Well, because then they would hit the edges on the inside of our tub.  Ug.  So many things to consider on tub projects!


bath caddy edge | the Magic Brush

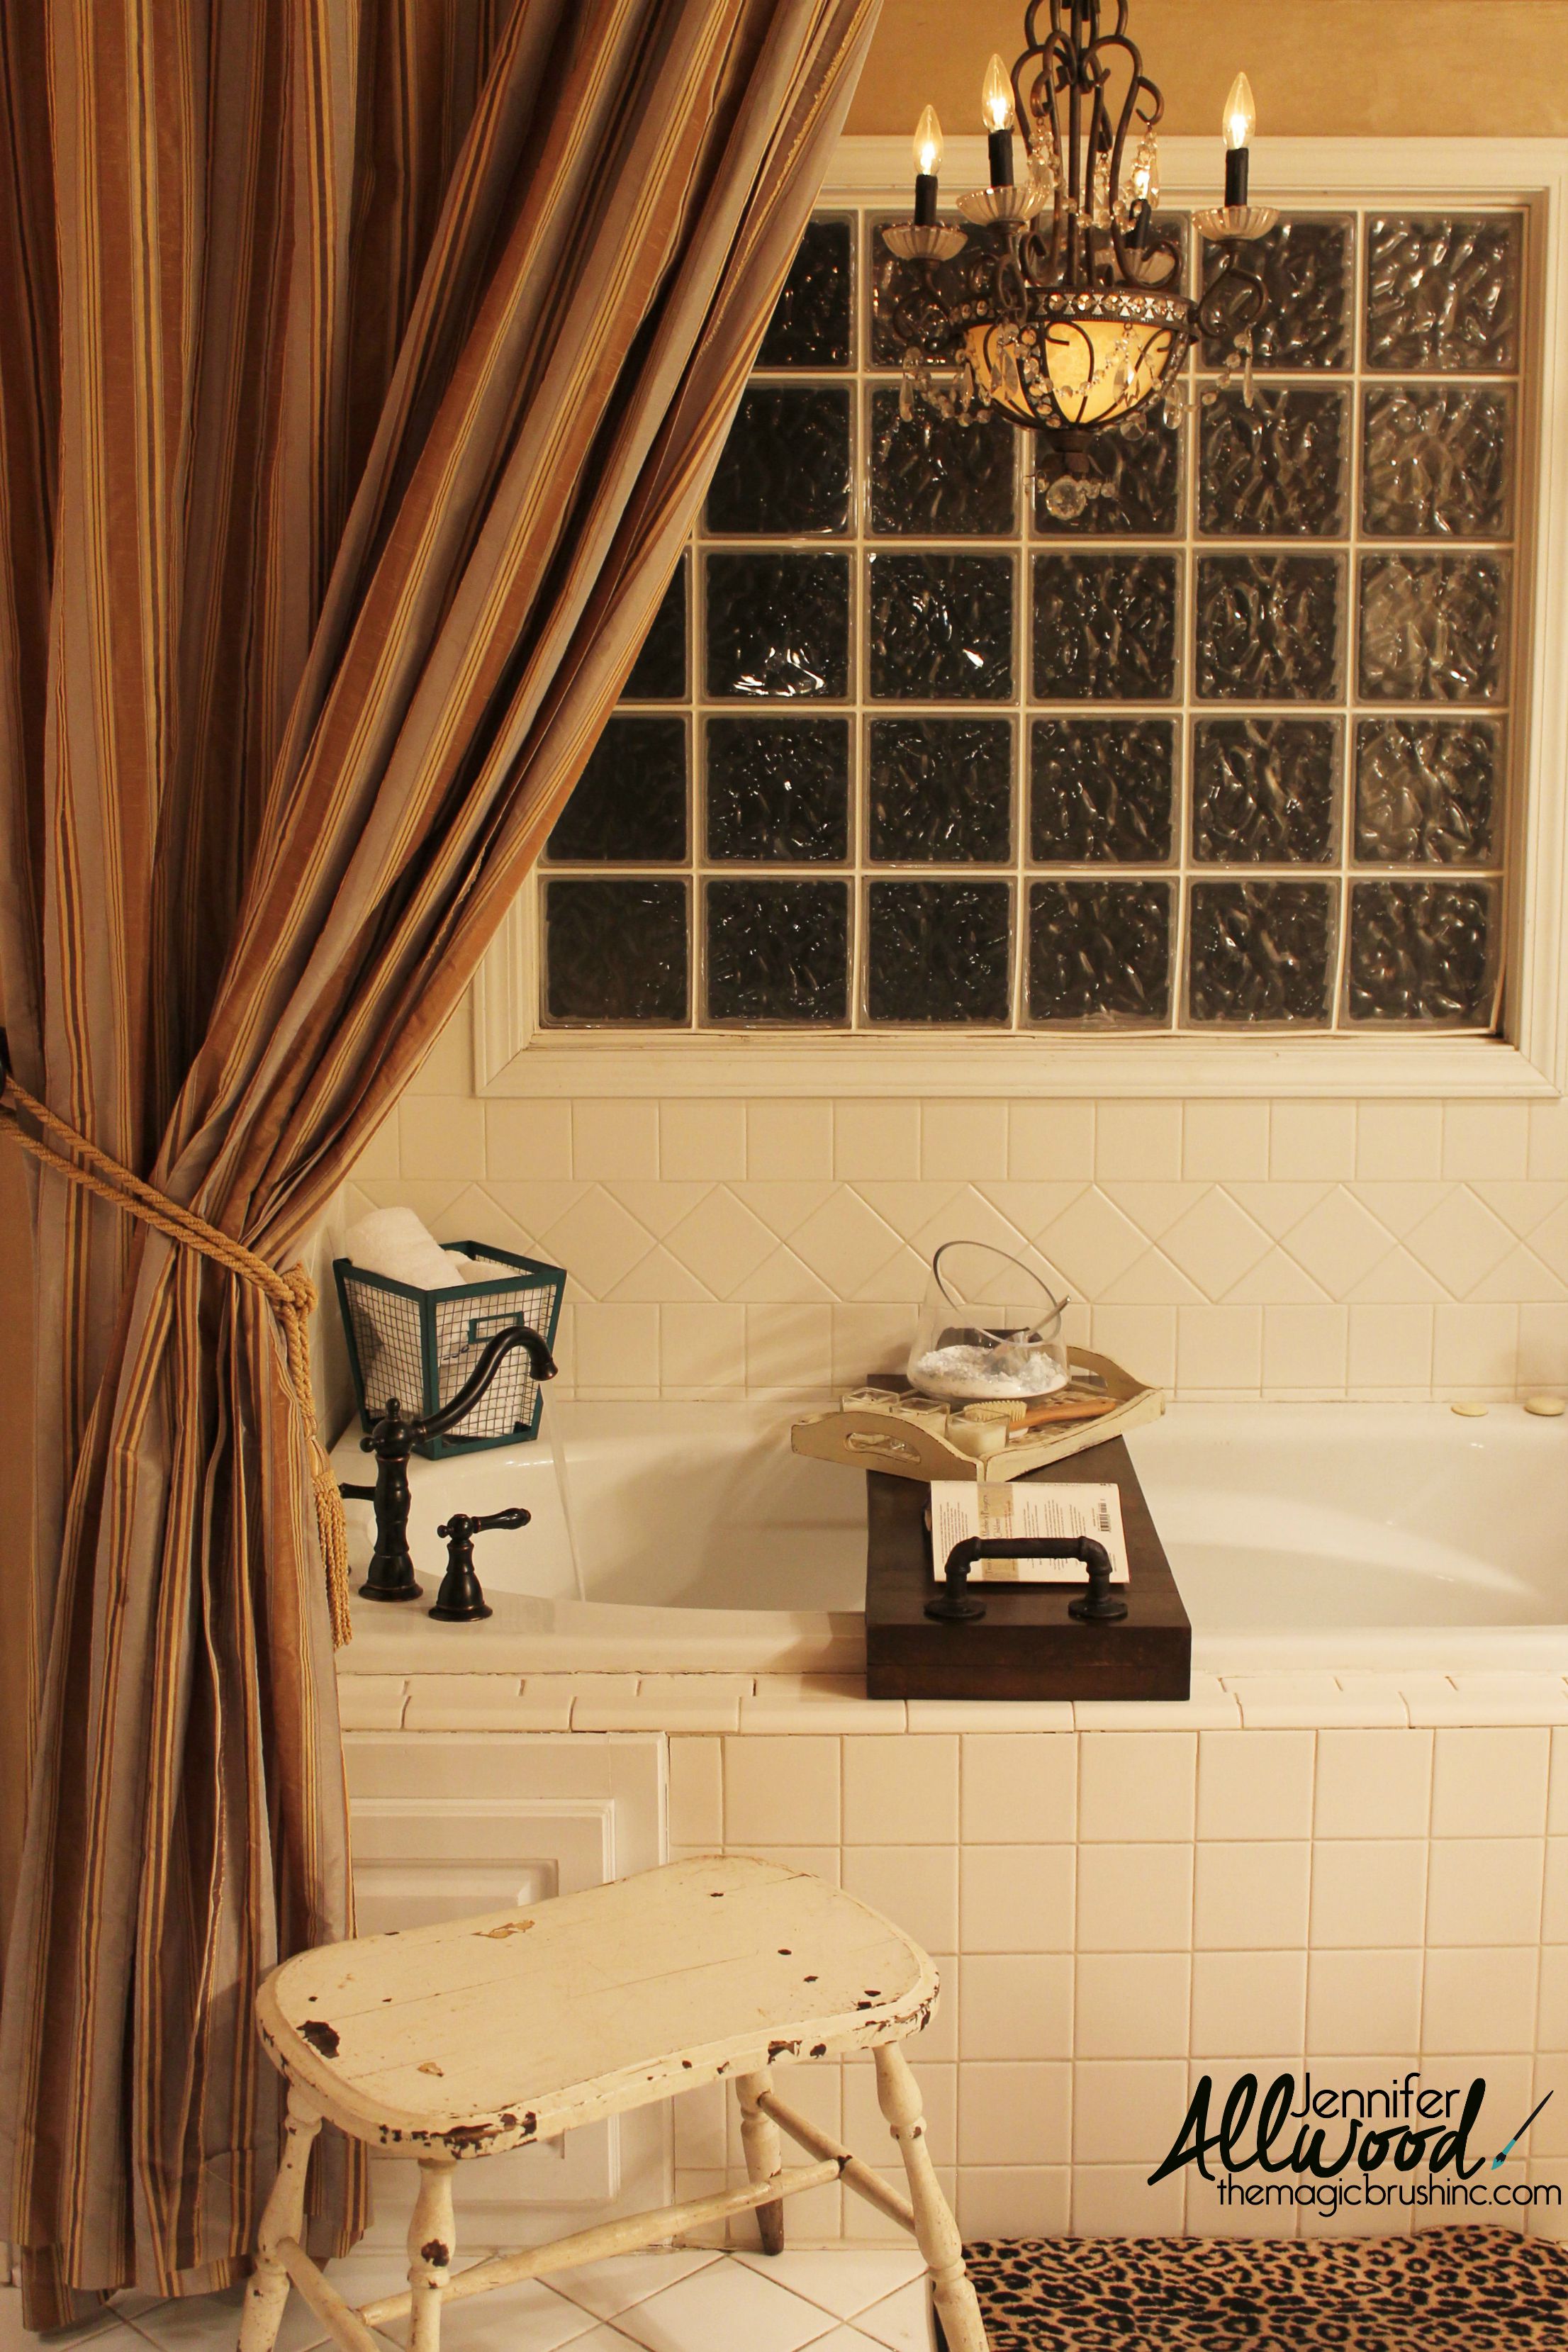
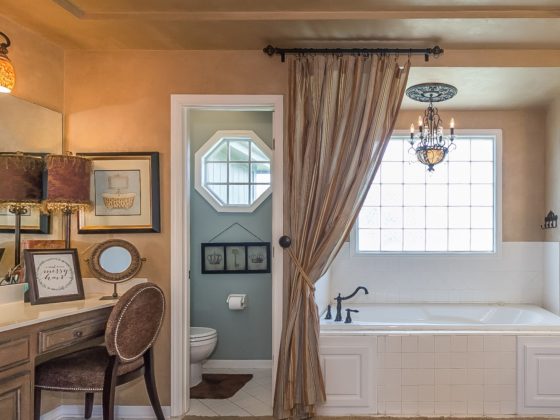
For instance, this side of the tub needed a “lip” and for the caddy to “hug” it.  (And thanks in advance for not noticing the grout needs replaced.)


bath caddy side view | The Magic Brush

The other side of the bath caddy, however, needed just needed to sit on the edge with no lip piece.  If you go to make a bath shelf, take your tub dynamics into consideration!

Note: I would also suggest you put pads under your end pieces as not to scratch your tub.  At the writing of this blog post, this step (which I’m guessing is mine to do since Mr. Magic did the rest of the project) is not finished. It would be as simple as me getting the pads out of the kitchen drawer and walking them up to the bathroom.  But let’s be real.  It’s easier to type about it than it is to actually do it.  The estimated time of completion for me to get pads under the bath caddy is approximately 2017. Or whenever Ava slides the shelf and it scratches my tub.  Just keepin’ it real.


bath caddy | The Magic Brush

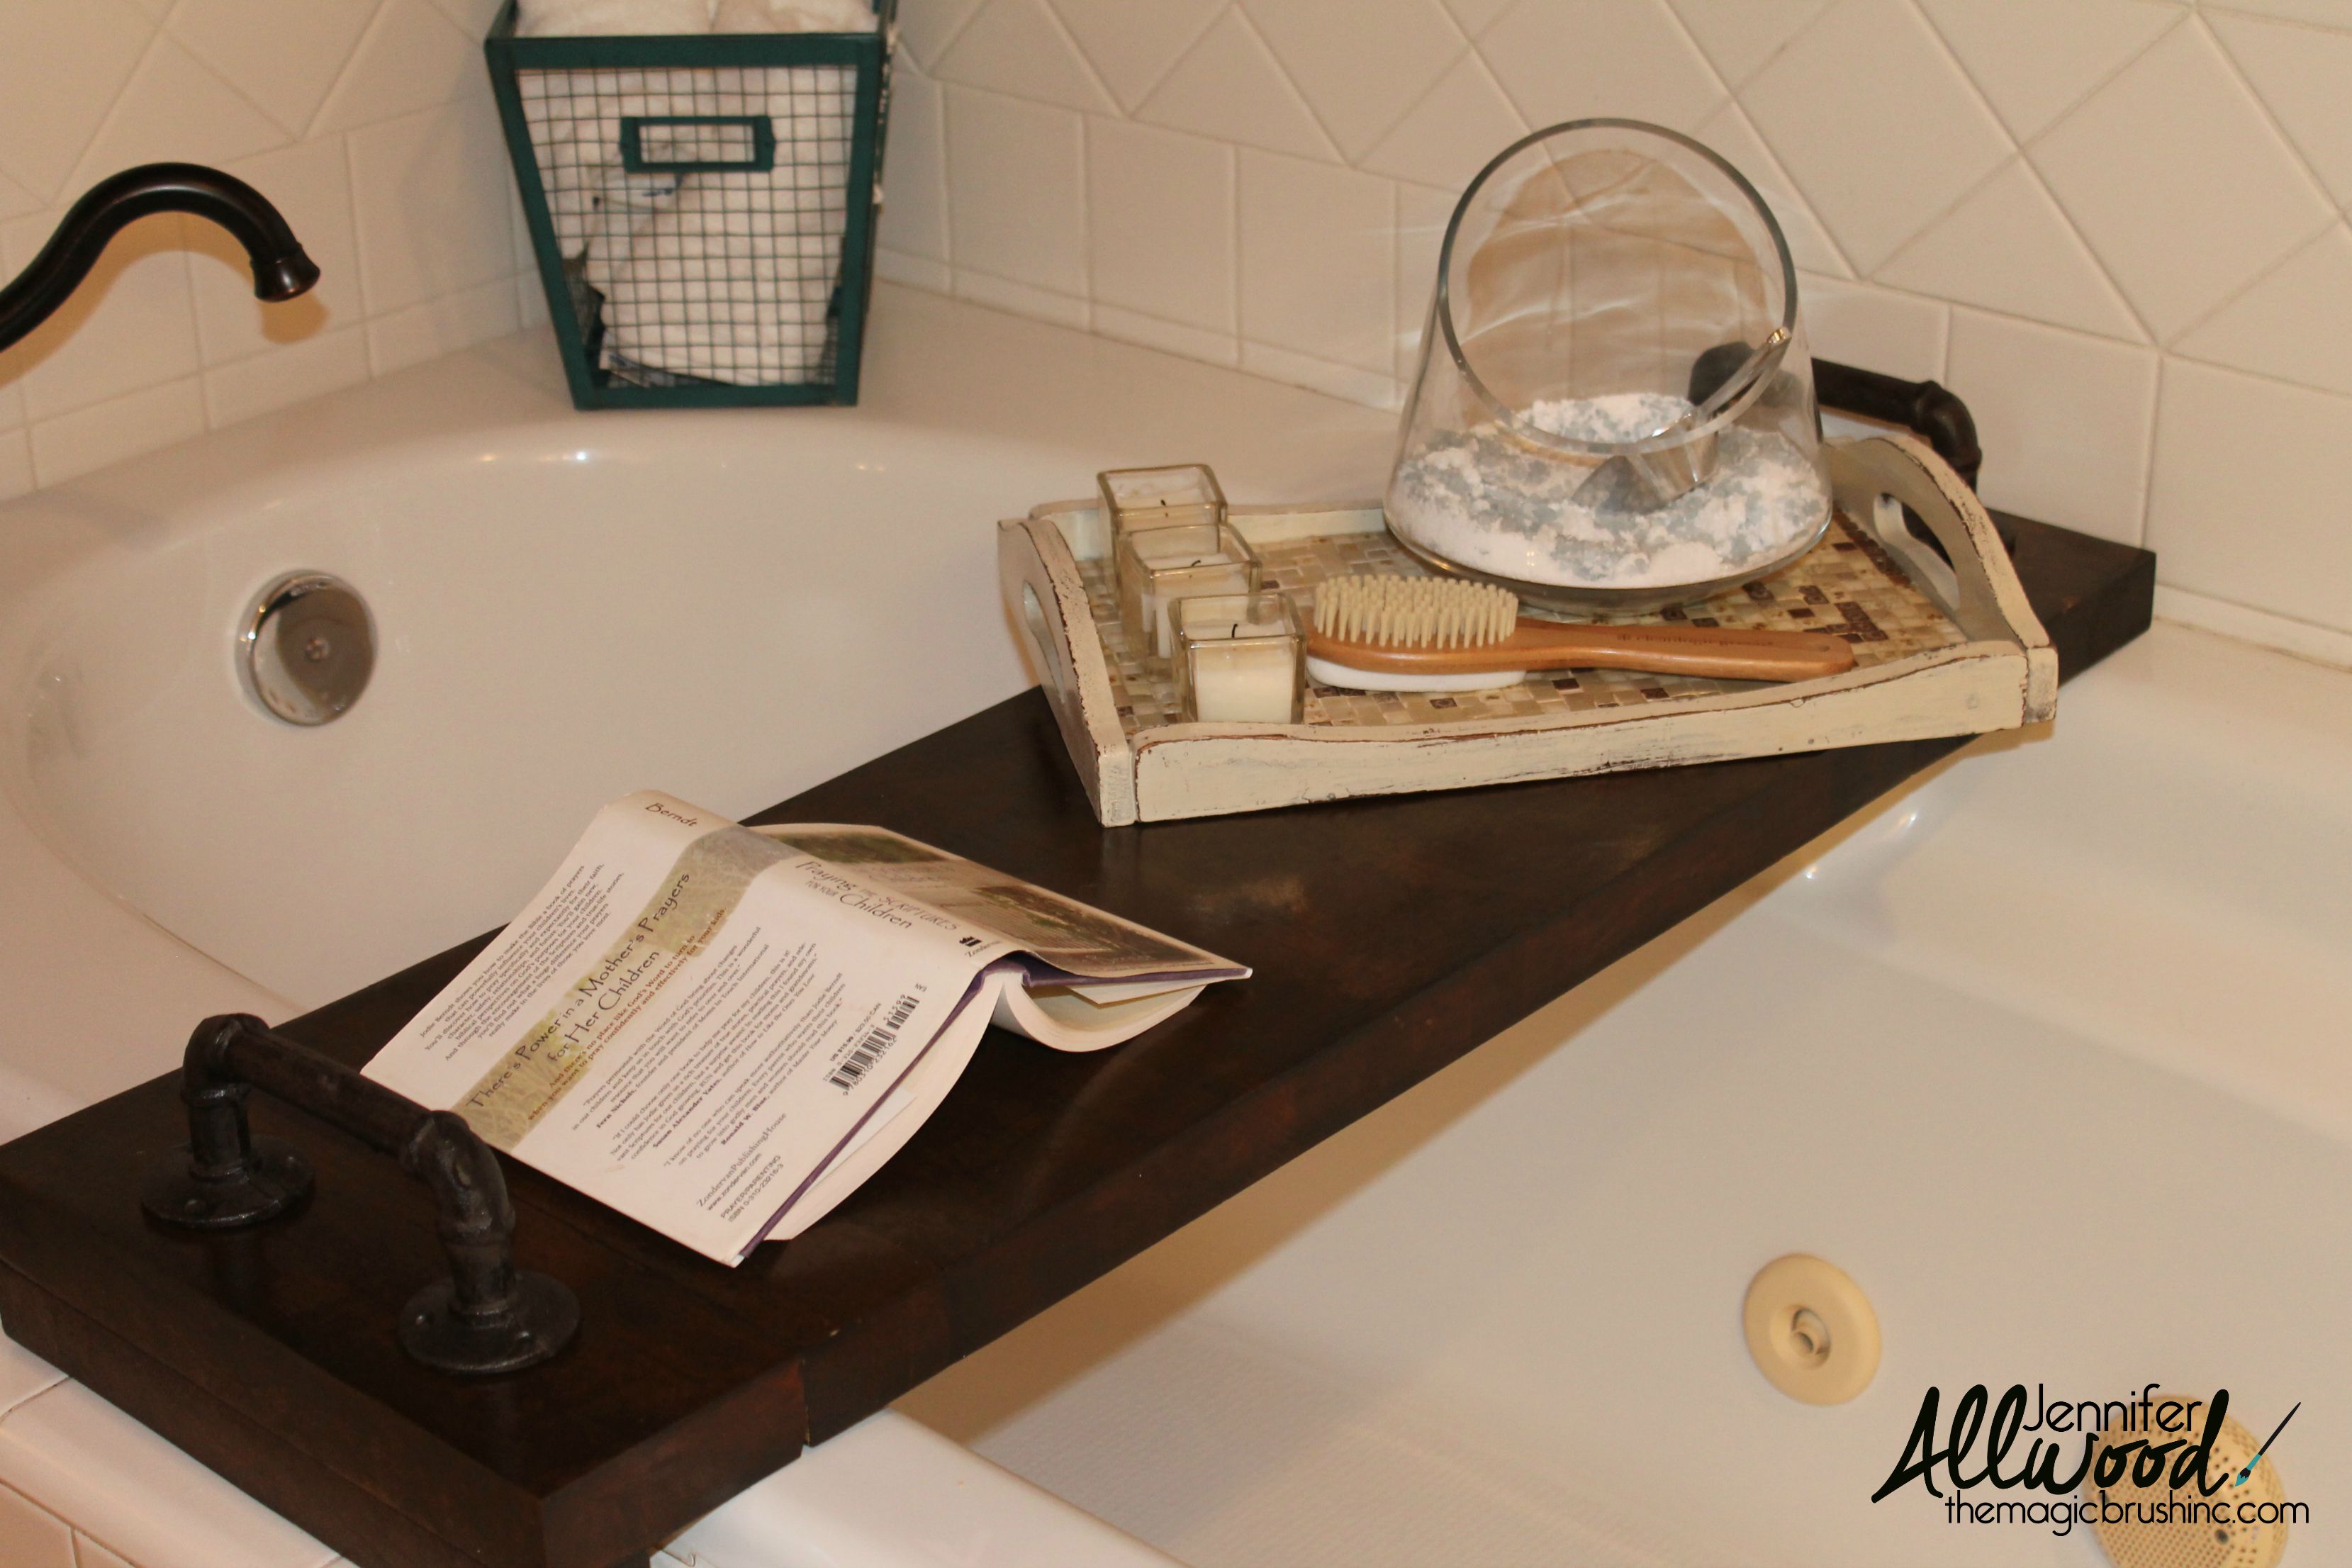
Oops.  Almost forgot!  The handles are from Hobby Lobby.  Cuz’ well, I adore them.  They weren’t cheap…. $11.99 for each.  But get them when they are on sale or use a coupon!


bath caddy hotmess |The Magic Brush inc

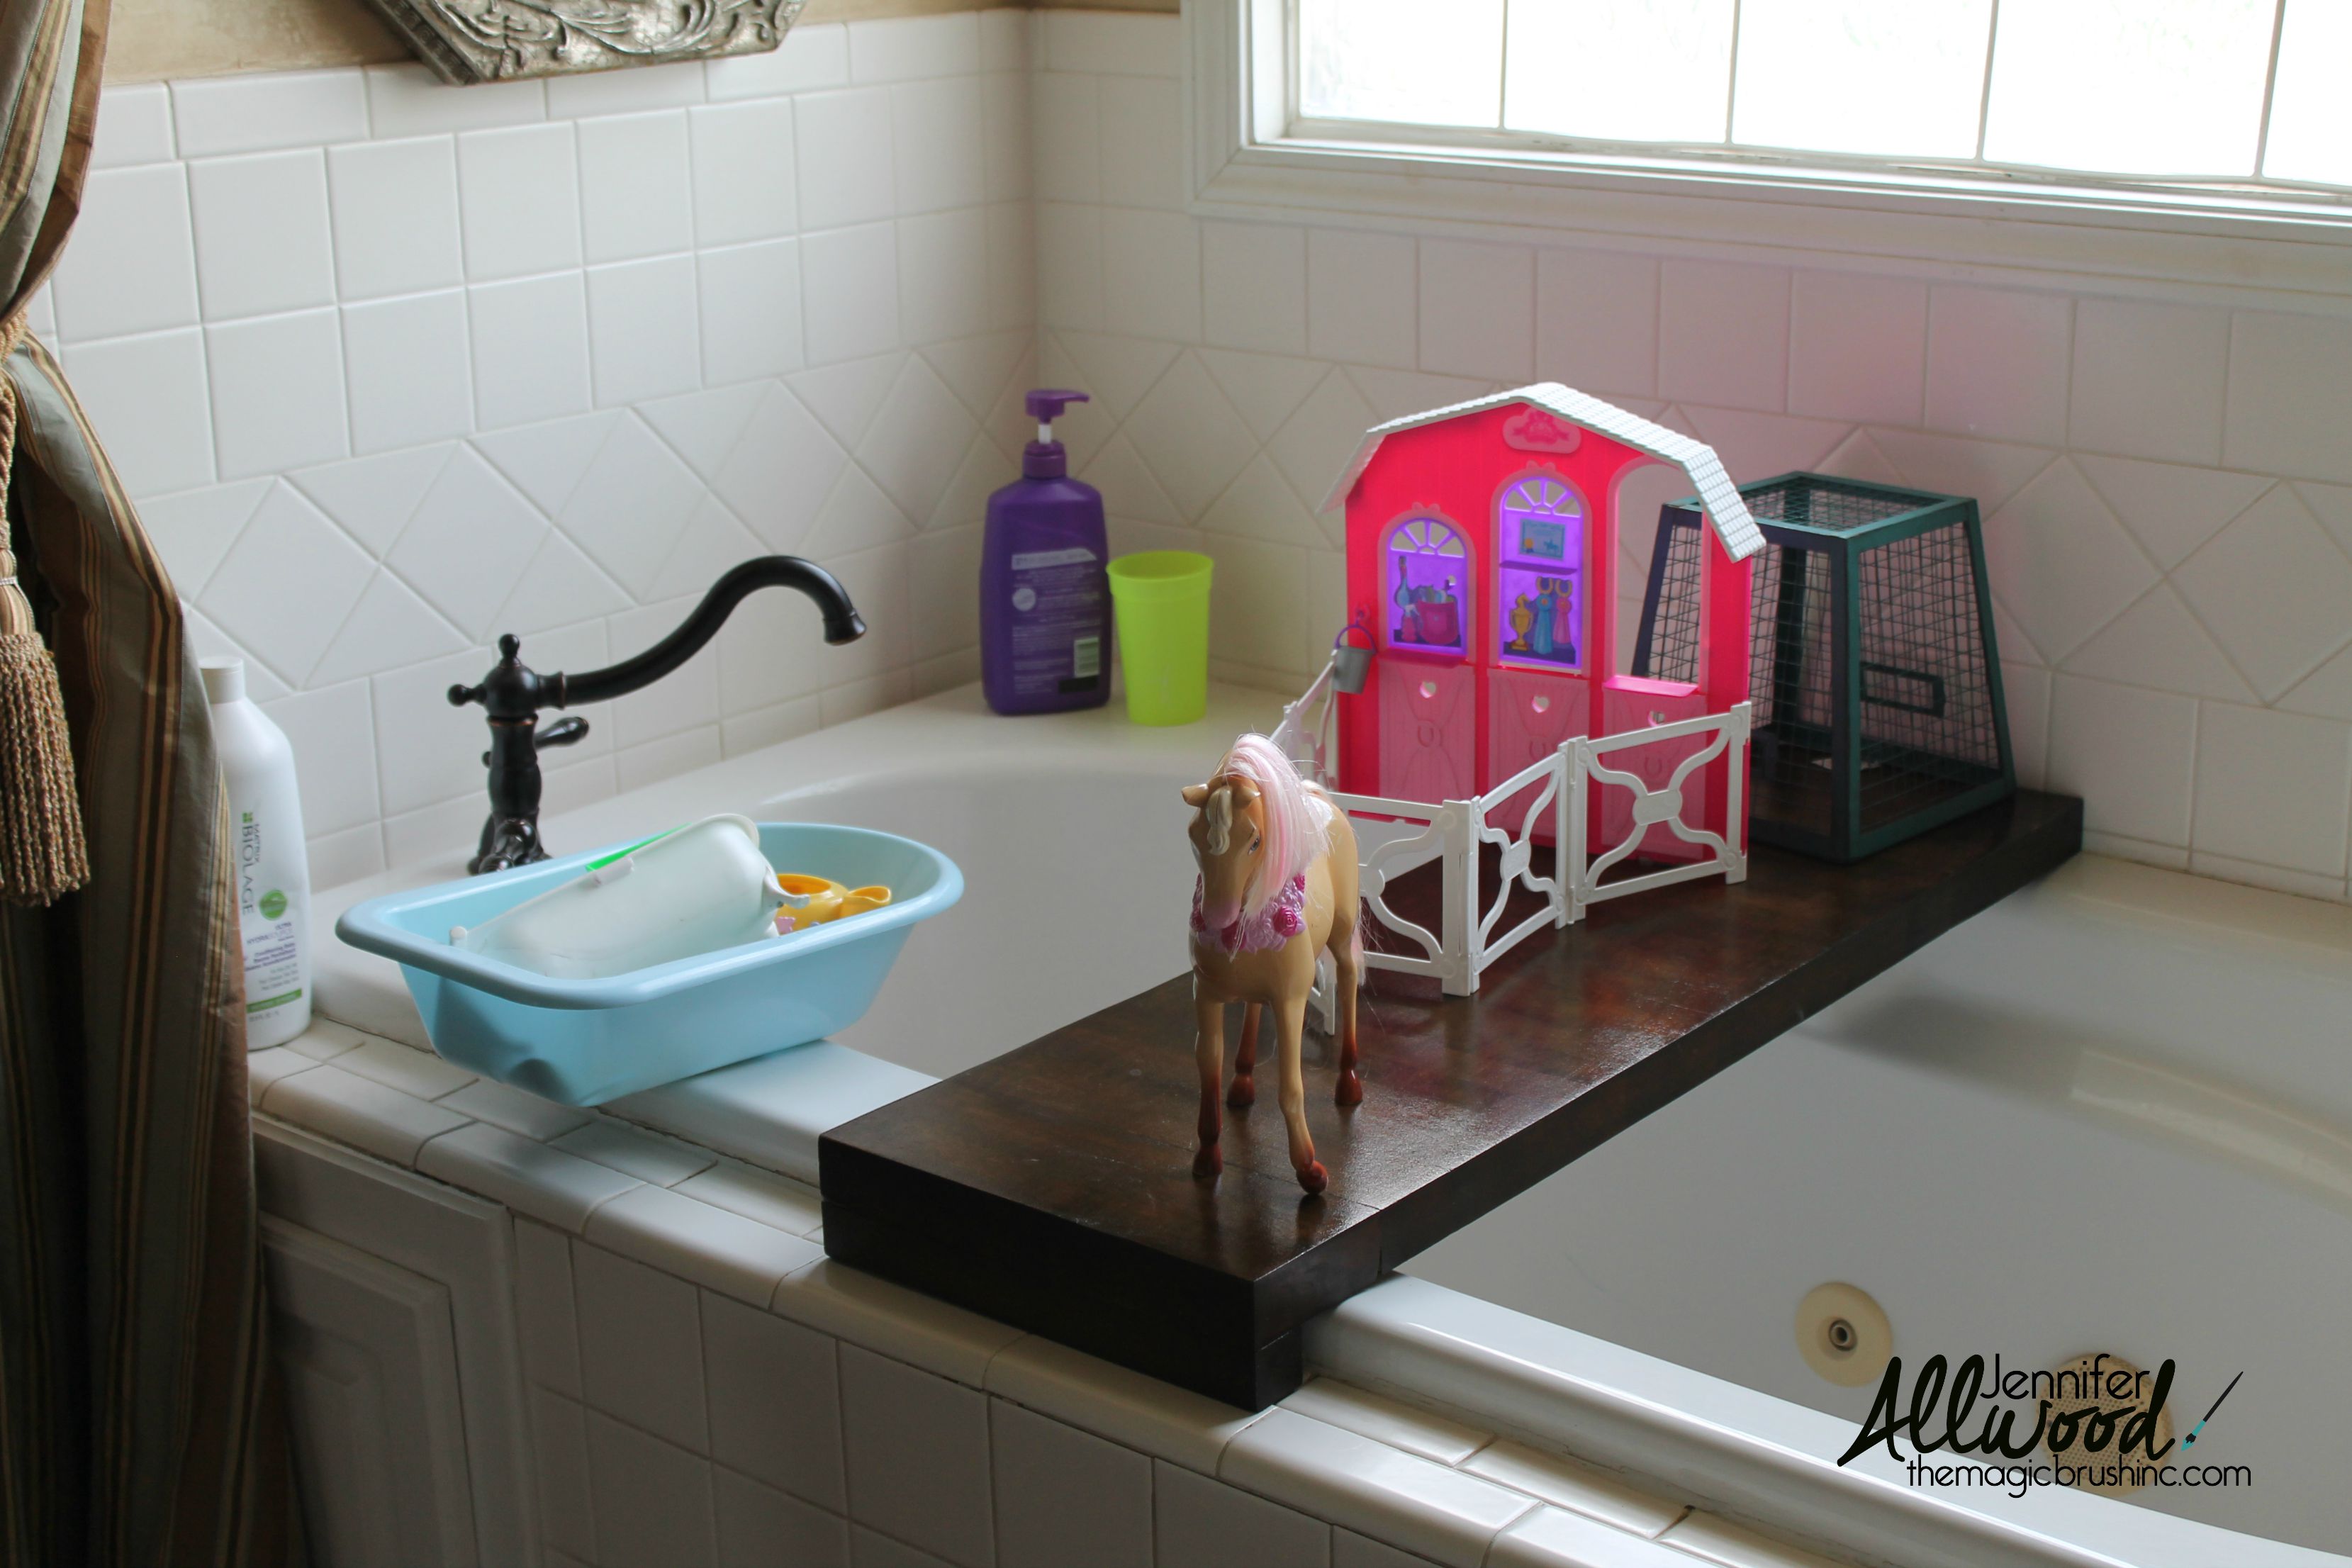
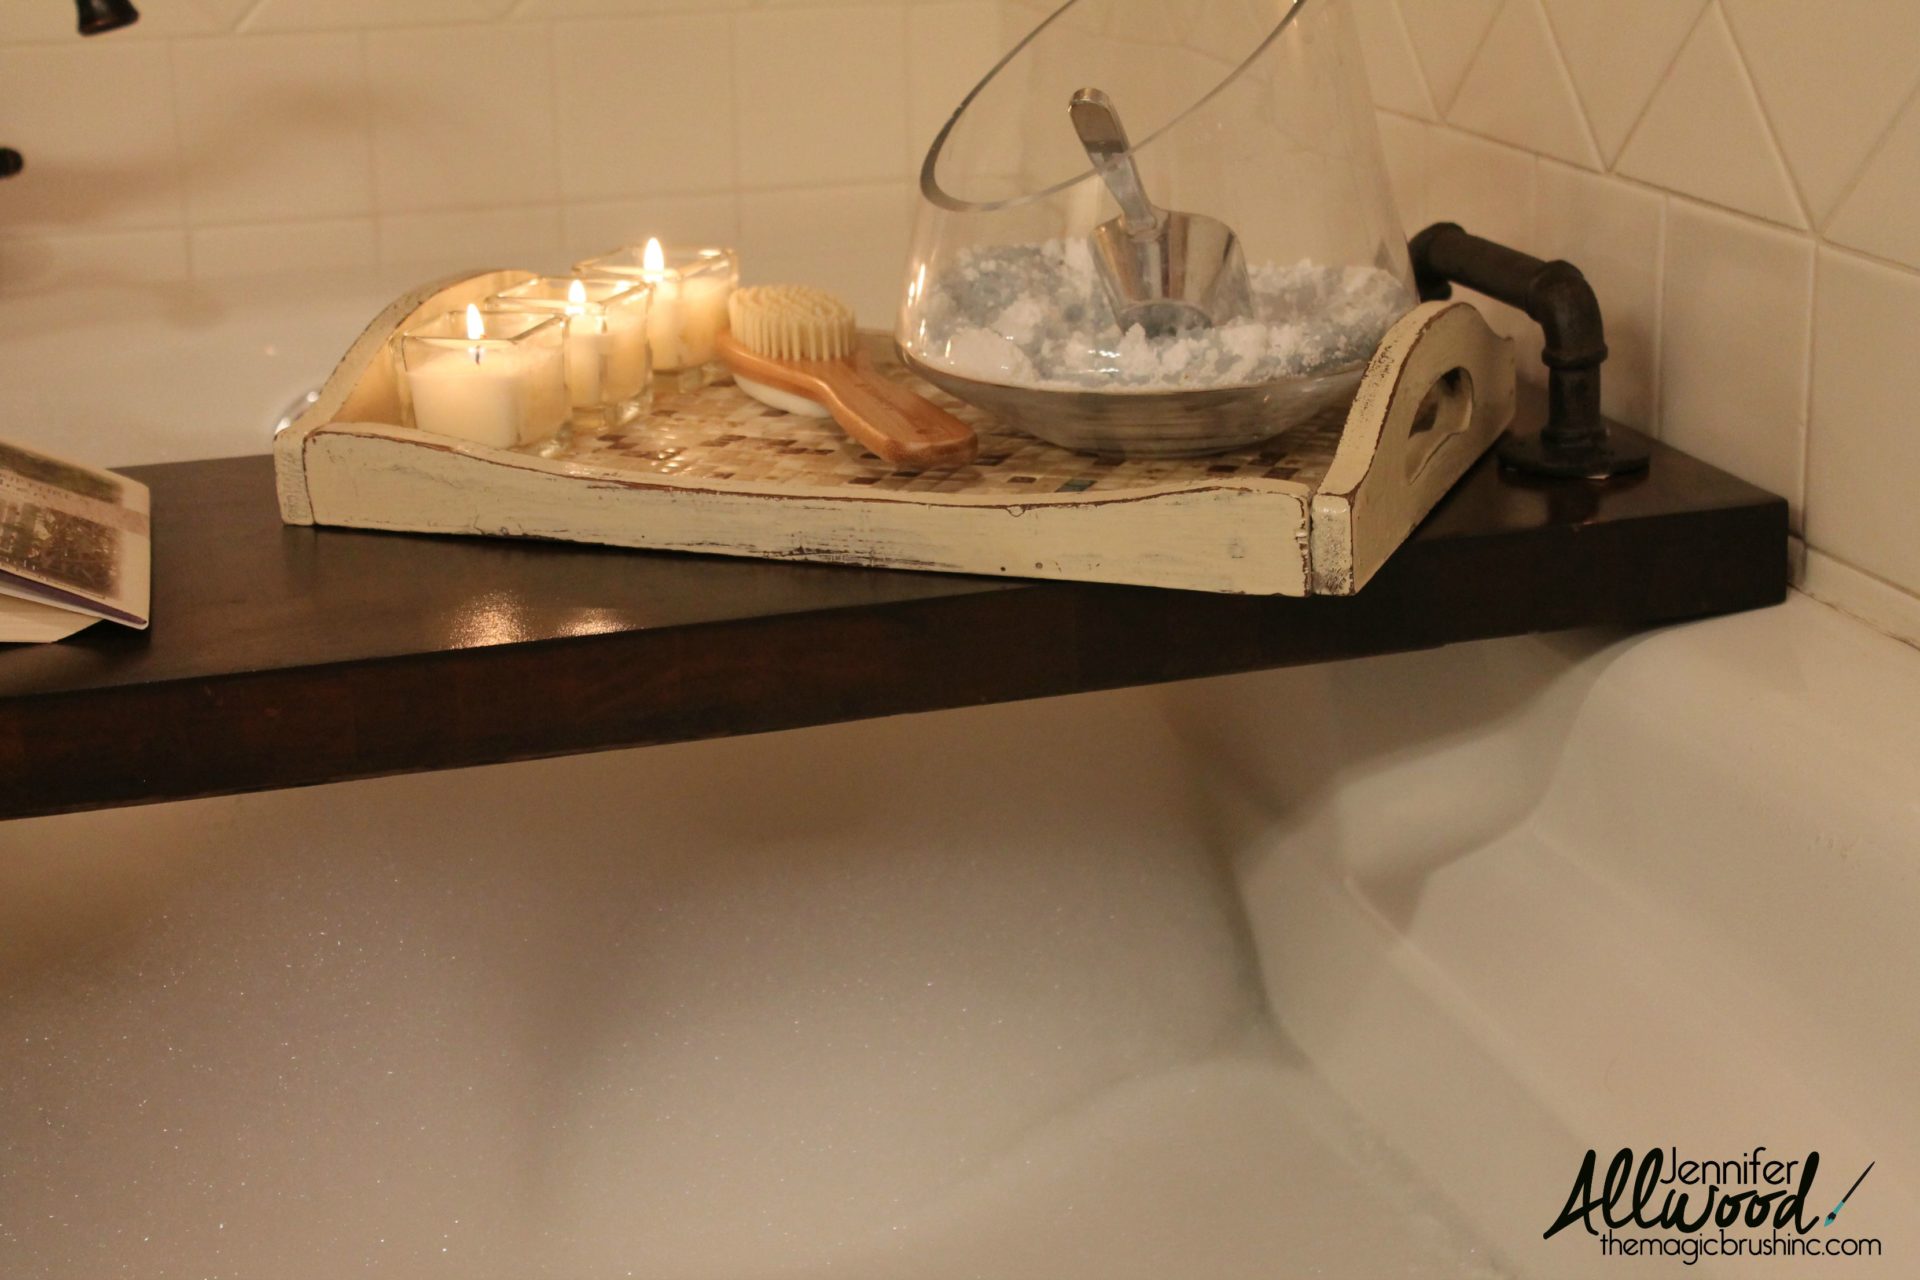
And speaking of keepin’ it real, THIS is how the bath caddy has REALLY been being used a few times.  We all know the staged pictures of candles and books are just smoke and mirrors, right?  THIS is real life.  And equally as beautiful in my opinion.


DIY bath caddy done | The Magic Brush

So there you have it.  Another amazing project that my hubby did for me.  I have this bath caddy / bath tray / bath shelf pinned on my Pinterest page for you to repin and as always, feel free to share this with a friend.

Happy creating,

Jennifer

If you loved this DIY project, check out my 10 easy updates to do before dinner video! It’s free and these quick little projects — some involving paint, some not — will make a BIG difference in your living space and for staging a home to sell!

I also have more projects Mr. Magic has helped me build, including this armchair “C” table that again lets me stack books conveniently where I am sitting. Speaking of books, did you know I wrote one?  How was that for a segway?! If you buy it, you could read it in the bath with your new bath caddy tray and in your comfy sofa or accent chair! Genius!


DIY Bath caddy | The Magic Brush


Total
2
Shares
Share 0
Tweet 0
Pin it 2
Related Topics
  • bath caddy
  • bath shelf
  • bath tray
  • cutting board
  • DIY
  • do it yourself
  • farmhouse
  • repurpose
Jennifer Allwood

Previous Article
  • Allwood
  • chalkboard paint
  • DIY Projects
  • do it yourself
  • Faux finish
  • jennifer-allwood-home
  • repurpose

How to make a chalkboard from an old thrift store print (easy gift idea!)

  • August 18, 2015
Read More
Next Article
  • Allwood
  • cabinets
  • decorating
  • DIY Projects
  • do it yourself
  • Faux finish
  • furniture
  • jennifer-allwood-home
  • Pinterest training
  • Stencil
  • work from home
  • working mom

My bath curtain. My bronze truffle cabinets. My lack of sewing skills.

  • August 28, 2015
Read More
You May Also Like
Read More
  • All Posts
  • blog
  • decorating
  • ja-home
  • jennifer-allwood-home
  • Uncategorized

Our HOT PINK Backyard Pool Remodel!

  • Jennifer Allwood
  • June 27, 2024
Read More
  • All Posts
  • Beach House
  • Florida Beach House
  • jennifer-allwood-home
  • Uncategorized

Using A Bike As Beach House Wall Decor

  • Jennifer Allwood
  • May 19, 2022
Read More
  • All Posts
  • Beach House
  • Florida Beach House
  • jennifer-allwood-home
  • Uncategorized

Laura Park Wallpaper In Our Non Beach Themed Beach House

  • Jennifer Allwood
  • May 11, 2022
Jennifer Allwood Master Bedroom Loft
Read More
  • All Posts
  • Beach House
  • Uncategorized

The Beach House Master Bedroom Loft Makeover

  • Jennifer Allwood
  • April 10, 2022
Jennifer Allwood Dutch Door
Read More
  • All Posts
  • blog
  • jennifer-allwood-home
  • Our New Home Remodel
  • Uncategorized

Adding A Modern Dutch Door To The Laundry Room

  • Jennifer Allwood
  • March 14, 2022
Read More
  • All Posts
  • Beach House
  • DIY Projects
  • Florida Beach House
  • jennifer-allwood-home
  • Uncategorized

Updating The Beach House Kitchen Backsplash

  • Jennifer Allwood
  • February 7, 2022
Jennifer Allwood Kitchen Cabinets
Read More
  • All Posts
  • Beach House
  • Uncategorized

Going Big On The Beach House Kitchen Cabinets

  • Jennifer Allwood
  • January 31, 2022
Jennifer Allwood Home Front door
Read More
  • All Posts
  • Beach House
  • decorating
  • DIY Projects
  • do it yourself
  • Florida Beach House
  • paint
  • Uncategorized

Beefing Up A Front Door In A Small Space

  • Jennifer Allwood
  • January 24, 2022
4 comments
  1. Pingback: My bath curtain. My bronze truffle cabinets. My lack of sewing skills. - The Magic Brush Inc
  2. Shannon says:
    October 14, 2015 at 8:10 pm

    Very nice! Love the use of dowel rods to keep it sturdy.

  3. Pingback: Great Ideas -- 16 DIY Wood Projects!
  4. Suhana Morgan says:
    November 7, 2018 at 4:31 am

    Wonderful tips and tricks to remodel the old bathroom. In MY Bathroom interior design, I am organize shower caddy, shower mirror, shower window, etc that give the whole bathroom looks perfect. How feelings you are?

Leave a Reply

You must be logged in to post a comment.

Jennifer Allwood Home
  • Home
  • Amazon Picks
  • Shop my Instagram
  • New House
  • Old House
  • Hair
  • Recipes
  • Adoption

Input your search keywords and press Enter.

This website uses cookies to improve your experience. We'll assume you're ok with this, but you can opt-out if you wish. Cookie settingsI LOVE COOKIES
Privacy & Cookies Policy

Privacy Overview

This website uses cookies to improve your experience while you navigate through the website. Out of these cookies, the cookies that are categorized as necessary are stored on your browser as they are essential for the working of basic functionalities of the website. We also use third-party cookies that help us analyze and understand how you use this website. These cookies will be stored in your browser only with your consent. You also have the option to opt-out of these cookies. But opting out of some of these cookies may have an effect on your browsing experience.
Necessary
Always Enabled
Necessary cookies are absolutely essential for the website to function properly. This category only includes cookies that ensures basic functionalities and security features of the website. These cookies do not store any personal information.
Non-necessary
Any cookies that may not be particularly necessary for the website to function and is used specifically to collect user personal data via analytics, ads, other embedded contents are termed as non-necessary cookies. It is mandatory to procure user consent prior to running these cookies on your website.
SAVE & ACCEPT